
Meta Description
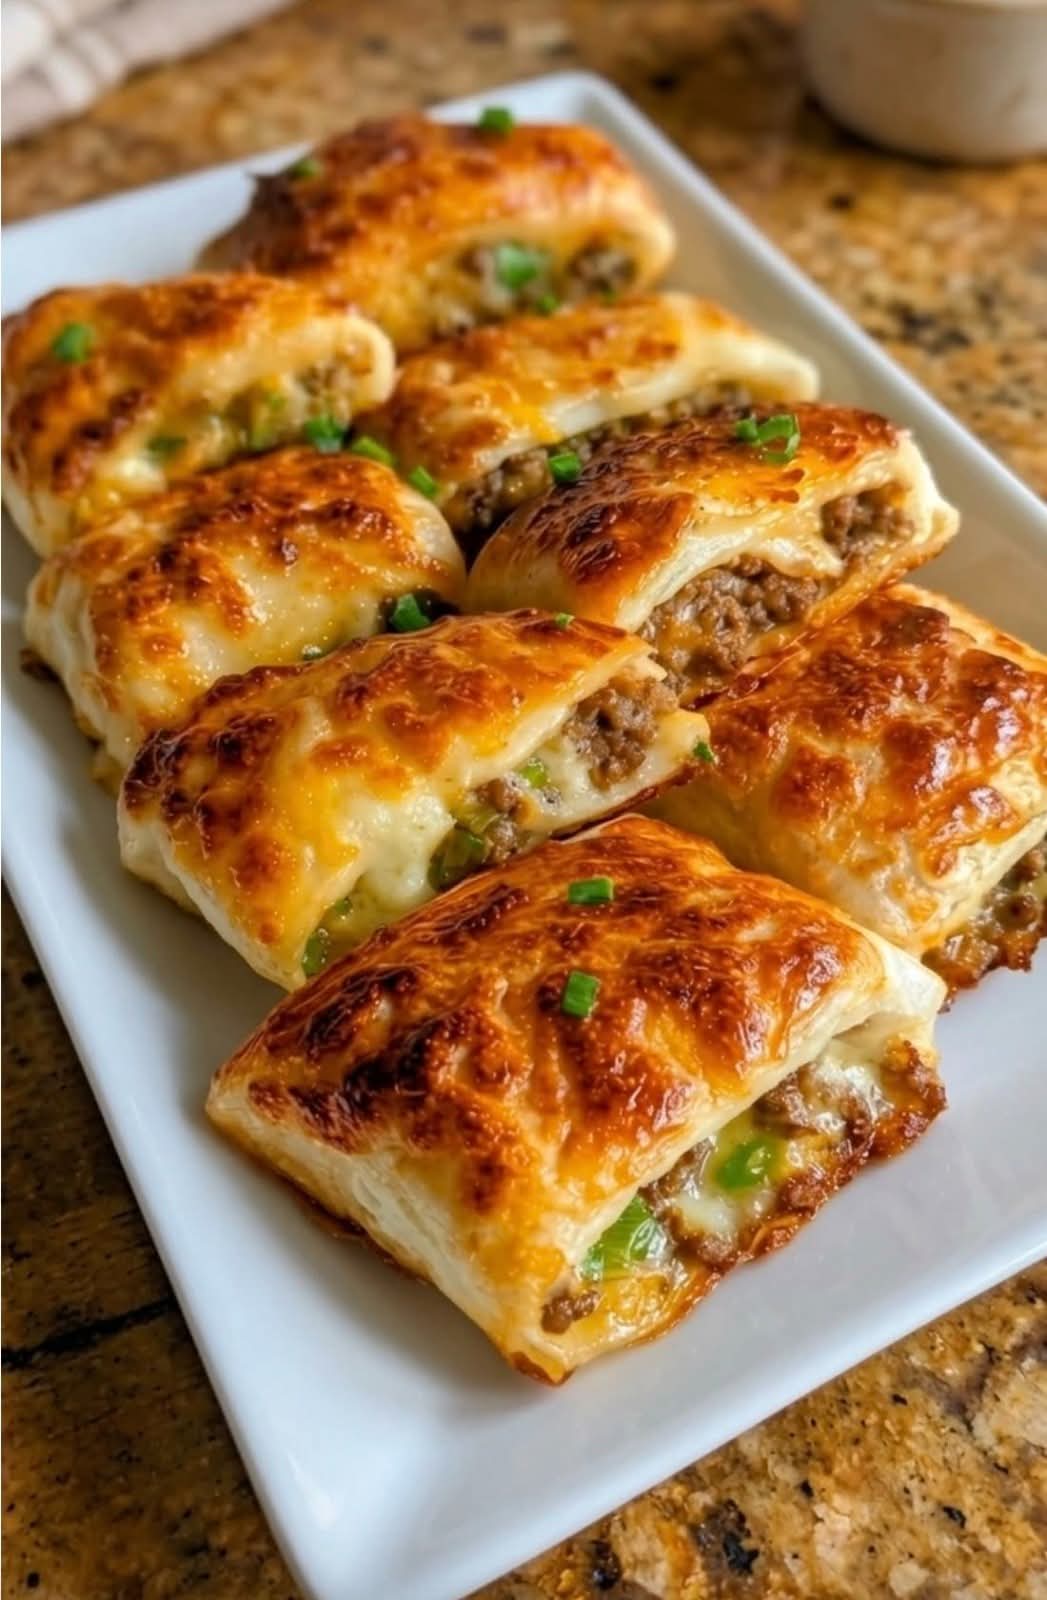
Make these Cheesy Beef Taco Pockets with seasoned ground beef, melted cheddar cheese, and flaky pastry. This easy handheld dinner is perfect for busy weeknights, lunchboxes, game day, or family meals.
Cheesy Beef Taco Pockets (Crispy, Cheesy, and Packed with Tex-Mex Flavor)
Introduction
If you’re craving all the delicious flavors of tacos in a fun, handheld meal, these Cheesy Beef Taco Pockets are exactly what you need. Filled with perfectly seasoned ground beef, gooey melted cheddar cheese, and wrapped in a golden, flaky crust, these pockets are crispy on the outside and loaded with savory goodness on the inside.
They’re a fantastic alternative to traditional tacos because they’re easy to hold, less messy to eat, and perfect for lunches, picnics, meal prep, or quick family dinners. Every bite delivers the bold flavors of classic Tex-Mex seasoning, juicy beef, and rich melted cheese, making them a favorite with both kids and adults.
One of the best things about this recipe is how customizable it is. Add black beans, corn, jalapeños, bell peppers, or your favorite salsa to create your own signature version. You can also switch up the cheese by using Monterey Jack, Pepper Jack, or a Mexican cheese blend.
Whether baked until perfectly golden or cooked in an air fryer for an extra crispy finish, these Cheesy Beef Taco Pockets are guaranteed to disappear fast. Serve them with salsa, sour cream, guacamole, or queso dip for the ultimate Tex-Mex experience.
Why You’ll Love This Recipe
- Crispy, flaky golden crust.
- Filled with juicy seasoned beef.
- Loaded with melted cheese.
- Perfect for meal prep.
- Great for lunch or dinner.
- Freezer-friendly.
- Kid-approved.
- Easy to customize.
Ingredients
For the Filling
- 1 pound lean ground beef
- 1 tablespoon olive oil
- 1 small onion, finely diced
- 2 cloves garlic, minced
- 2 tablespoons taco seasoning
- ¼ cup water
- 1½ cups shredded cheddar cheese
- ½ cup shredded Monterey Jack cheese
For the Pockets
- 1 package refrigerated pizza dough or puff pastry
- 1 egg, beaten (for egg wash)
Optional Fillings
- ½ cup black beans
- ½ cup corn kernels
- Diced jalapeños
- Diced bell peppers
- Chopped cilantro
Optional Toppings
- Sesame seeds
- Fresh parsley
- Chopped cilantro
Kitchen Equipment
- Large skillet
- Baking sheet
- Parchment paper
- Rolling pin
- Pastry brush
- Sharp knife
Step-by-Step Instructions
Step 1: Preheat the Oven
Preheat your oven to 400°F (200°C).
Line a baking sheet with parchment paper.
Step 2: Cook the Beef
Heat the olive oil in a skillet over medium heat.
Add the onion and cook for about 3–4 minutes until softened.
Add the garlic and cook for another 30 seconds.
Stir in the ground beef and cook until browned, breaking it into crumbles.
Drain excess grease if necessary.
Step 3: Season the Filling
Add the taco seasoning and water.
Simmer for 3–5 minutes until the sauce thickens.
Remove from the heat and allow the beef to cool slightly.
Mix in both cheeses.
Step 4: Prepare the Dough
Roll out the pizza dough or puff pastry and cut it into 6–8 equal rectangles.
Step 5: Fill the Pockets
Place a generous spoonful of the beef mixture onto one half of each rectangle.
Leave a small border around the edges.
Fold the dough over the filling and press the edges firmly with a fork to seal.
Step 6: Brush with Egg Wash
Brush the tops with beaten egg for a shiny golden finish.
Cut a small slit in the top of each pocket to allow steam to escape.
Step 7: Bake
Bake for 18–22 minutes, or until the pockets are puffed and beautifully golden brown.
Step 8: Cool and Serve
Allow the taco pockets to cool for about 5 minutes before serving.
Serving Suggestions
Serve with salsa, guacamole, sour cream, queso dip, pico de gallo, Mexican rice, refried beans, tortilla chips, or a crisp green salad.
Expert Tips
Allow the filling to cool before adding it to the dough to prevent soggy pockets. Avoid overfilling, as this can cause the pockets to burst during baking. Seal the edges tightly with a fork to keep the filling inside. For an extra crispy crust, bake on the middle oven rack and brush generously with egg wash.
Flavor Variations
Spicy Taco Pockets
Add diced jalapeños, pepper jack cheese, and a dash of hot sauce.
Chicken Taco Pockets
Replace the ground beef with shredded rotisserie chicken.
Philly Taco Pockets
Add sautéed onions, mushrooms, and peppers for extra flavor.
Breakfast Taco Pockets
Fill with scrambled eggs, cooked sausage, and cheddar cheese for a hearty breakfast version.
Storage
Store leftover taco pockets in an airtight container.
- Refrigerator: Up to 4 days
- Freezer: Up to 3 months
Wrap individually before freezing for easy grab-and-go meals.
Reheating
Reheat in a 350°F (175°C) oven for 10 minutes, an air fryer at 350°F for 4–5 minutes, or microwave for 1–2 minutes. For the crispiest texture, avoid microwaving whenever possible.
Nutrition Information (Approximate Per Pocket)
- Calories: 390
- Protein: 22g
- Carbohydrates: 24g
- Fat: 23g
- Saturated Fat: 10g
- Fiber: 2g
- Sugar: 2g
- Sodium: 610mg
Nutrition values are estimates and may vary depending on the ingredients used.
Frequently Asked Questions
Can I make these ahead of time?
Yes. Assemble the taco pockets, refrigerate them for up to 24 hours, then bake when ready to serve.
Can I air fry them?
Absolutely. Air fry at 375°F (190°C) for 10–12 minutes, flipping halfway if needed.
Can I use crescent roll dough?
Yes. Crescent roll dough works well and creates a softer, buttery crust.
What’s the best cheese for taco pockets?
Cheddar, Monterey Jack, Pepper Jack, Colby Jack, or a Mexican cheese blend all melt beautifully.
Can I freeze unbaked taco pockets?
Yes. Freeze them on a baking tray until solid, then transfer to freezer bags. Bake from frozen, adding about 5–7 extra minutes to the baking time.
Conclusion
These Cheesy Beef Taco Pockets combine everything you love about tacos into one crispy, handheld meal. Packed with seasoned ground beef, melted cheese, and wrapped in a flaky golden crust, they’re perfect for weeknight dinners, lunchboxes, parties, or game-day snacks. Easy to customize, freezer-friendly, and incredibly satisfying, this recipe is sure to become a family favorite that everyone will request again and again.