Introduction
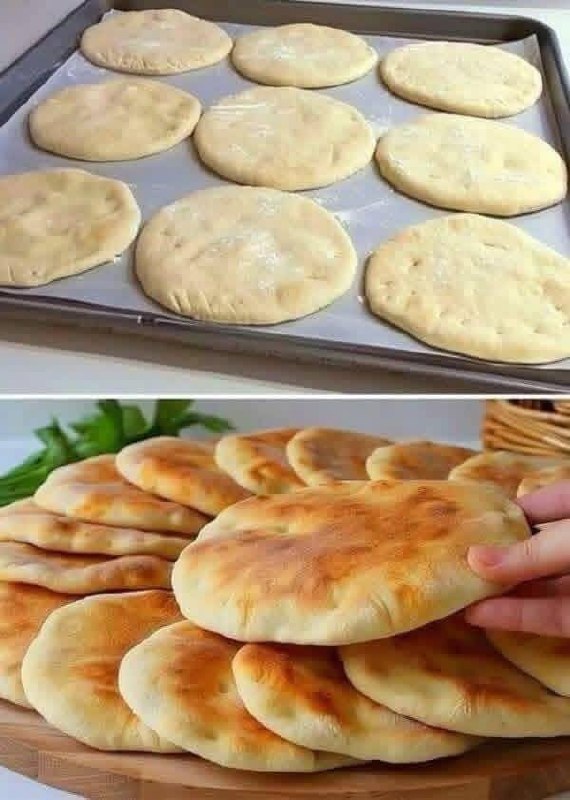
The aroma of freshly baked biscuits wafting through the kitchen is a universal language of comfort, and today, we’re diving into the delightful world of Yonker Biscuits. These aren’t just any biscuits; they’re a testament to the simple joy of homemade baking, promising a fluffy, tender experience that will transport you straight to breakfast heaven. Imagine biting into a golden-brown exterior that gives way to a soft, airy interior, perfectly ready to soak up butter, jam, or your favorite gravy. Yonker Biscuits are more than just a recipe; they’re an invitation to create warmth and happiness in your home, a humble yet utterly satisfying staple that embodies the heart of comfort food.
What makes Yonker Biscuits truly special is their effortless charm and incredible versatility. Whether you’re a seasoned baker or just starting your culinary journey, this recipe is designed for success. We’re focusing on achieving that quintessential fluffy texture and rich flavor with minimal fuss, making them an ideal choice for a weekend breakfast, a hearty brunch, or even a quick side dish for dinner. Their rustic appearance, often hand-shaped or simply dropped, adds to their homemade appeal, reminding us that sometimes the most delicious things are born from simplicity and a touch of love. Get ready to discover your new go-to biscuit recipe, one that will undoubtedly become a cherished part of your kitchen repertoire.
The magic behind these biscuits lies in a few key techniques and ingredients, particularly the use of self-rising flour, which streamlines the process and guarantees a consistent rise. This eliminates the need for separate leavening agents, making the preparation quick and foolproof. We’ll guide you through each step, from mixing the dough to achieving that perfect golden hue, ensuring that every batch of Yonker Biscuits you make is a triumph. Prepare to fill your home with an irresistible scent and your table with a pile of these irresistible, flaky delights. Once you taste these, you’ll understand why homemade biscuits are an unparalleled pleasure.
Nutritional Information
Per serving (approximate values):
- Calories: 220
- Protein: 5g
- Carbohydrates: 30g
- Fat: 9g
- Fiber: 1g
- Sodium: 450mg
Ingredients
- 2 ½ cups (300g) White Lily Self-Rising Flour, plus more for dusting
- ½ cup (113g) unsalted butter, very cold and cut into ½-inch cubes, or ½ cup (118ml) vegetable oil
- 1 cup (240ml) cold buttermilk (or whole milk mixed with 1 tablespoon lemon juice or white vinegar, let sit for 5 minutes)
- 1 tablespoon granulated sugar (optional, for a hint of sweetness)
- ½ teaspoon salt (if using all-purpose flour; self-rising flour already contains salt, so adjust accordingly)
- 2 tablespoons melted butter or milk for brushing tops (optional, for golden finish)
Instructions
- Preheat your oven to 425°F (220°C). Lightly grease a baking sheet or line it with parchment paper.
- In a large mixing bowl, whisk together the self-rising flour and optional sugar and salt (if using).
- If using cold butter: Add the cold, cubed butter to the flour mixture. Using a pastry blender, your fingertips, or two knives, cut the butter into the flour until the mixture resembles coarse crumbs with some pea-sized pieces of butter remaining. The key is to work quickly to keep the butter cold. If using vegetable oil: Pour the oil directly into the flour mixture and mix with a fork until well combined and crumbly.
- Make a well in the center of the flour mixture. Pour in the cold buttermilk.
- Using a fork or a rubber spatula, gently mix the ingredients until just combined. The dough should be shaggy and sticky, but all the flour should be moistened. Be very careful not to overmix, as this will lead to tough biscuits. A few dry streaks are better than overmixing.
- Turn the dough out onto a lightly floured surface. Gently knead the dough 5-6 times, just until it comes together. Avoid excessive kneading. If you desire flakier layers, you can gently pat the dough into a rectangle and fold it in thirds, then pat it down again. Repeat this folding process 2-3 times.
- Pat the dough out to about ½ to ¾-inch thickness.
- For cut biscuits: Use a 2-inch biscuit cutter (or a drinking glass) dipped in flour to cut out the biscuits. Press straight down without twisting the cutter to ensure an even rise. Gather the scraps, gently re-pat, and cut out any remaining biscuits.
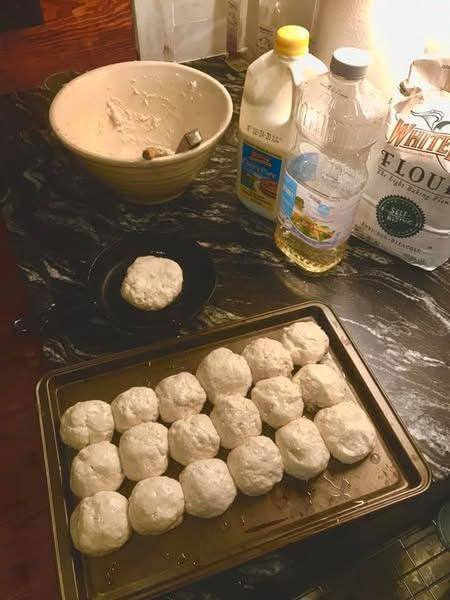
- For drop biscuits: Using a large spoon or an ice cream scoop, drop mounds of dough onto the prepared baking sheet, leaving about 1-2 inches between each biscuit. These will have a more rustic appearance.
- Place the biscuits on the prepared baking sheet. If desired, brush the tops with a little melted butter or milk for a golden-brown finish.
- Bake for 12-15 minutes, or until the tops are golden brown and the biscuits are cooked through. Baking time may vary depending on your oven and the size of your biscuits.
- Remove from the oven and transfer to a wire rack to cool slightly. Serve warm.
Cooking Tips and Variations
Achieving biscuit perfection is all about gentle handling and understanding your ingredients. Here are some tips to ensure your Yonker Biscuits are consistently light, fluffy, and delicious.
Tips for Biscuit Success
- Don’t Overmix: This is the golden rule of biscuit making! Overmixing develops gluten, which leads to tough, dense biscuits. Mix just until the ingredients are combined and no dry streaks of flour remain. The dough should look shaggy and a bit sticky.
- Keep Ingredients Cold: If using butter, ensure it’s very cold, straight from the refrigerator. Cold fat creates pockets of steam during baking, which contributes to those desirable flaky layers. Similarly, cold buttermilk helps keep the dough cool.
- Gentle Handling: When you turn the dough out onto your work surface, resist the urge to vigorously knead it. A few gentle folds or pats are all that’s needed to bring the dough together.
- Straight Down Cut: If using a biscuit cutter, press straight down into the dough without twisting. Twisting seals the edges of the biscuit, preventing it from rising properly.
- Crowd for Soft Sides: For softer-sided biscuits, place them closer together on the baking sheet so they touch. For crispier edges, space them further apart.
- Self-Rising Flour is Key: White Lily Self-Rising Flour is specifically formulated for light and tender baked goods, and it already contains leavening agents and salt. Using it simplifies the recipe and helps ensure a consistent rise. If you only have all-purpose flour, you can make your own self-rising flour by adding 1 ½ teaspoons baking powder and ¼ teaspoon salt per cup of all-purpose flour.
- Buttermilk vs. Milk: Buttermilk adds a subtle tang and reacts with the leavening agents in the self-rising flour to produce a tender crumb. If you don’t have buttermilk, you can easily make a substitute by adding 1 tablespoon of white vinegar or lemon juice to a measuring cup, then filling the rest with regular milk to the 1-cup line. Let it sit for 5 minutes before using.
Recipe Variations
- Cheesy Biscuits: Fold in ½ cup of shredded sharp cheddar or Parmesan cheese with the flour. A pinch of garlic powder can also be added for extra flavor.
- Herbed Biscuits: Mix 1-2 tablespoons of finely chopped fresh herbs like chives, rosemary, thyme, or parsley into the dry ingredients.
- Sweet Biscuits: Increase the sugar to 2-3 tablespoons for a sweeter biscuit, perfect for pairing with fruit and whipped cream. You can also add a ½ teaspoon of cinnamon or a pinch of nutmeg.
- Garlic & Herb: After baking, brush warm biscuits with melted butter mixed with minced garlic and chopped fresh parsley.
- Everything Bagel Biscuits: Sprinkle generously with everything bagel seasoning before baking for a savory, textural crunch.
- Drop Biscuits: For an even quicker and more rustic option, simply drop spoonfuls of dough onto the baking sheet instead of cutting them. They will still be wonderfully fluffy but will have an irregular shape.
Storage and Reheating
Yonker Biscuits are undoubtedly at their best when enjoyed fresh from the oven, but sometimes you’ll have leftovers, or you might want to bake a batch ahead of time. Proper storage and reheating will help maintain their delicious texture.
Storage
- Room Temperature: Once completely cooled, store biscuits in an airtight container or a resealable plastic bag at room temperature for up to 2 days. To prevent them from becoming soggy, you can place a paper towel at the bottom of the container to absorb any excess moisture.
- Refrigeration: For longer storage, biscuits can be refrigerated in an airtight container for up to 5 days. However, refrigeration can sometimes dry them out slightly.
- Freezing (Baked): Cooked and cooled biscuits freeze beautifully. Wrap individual biscuits tightly in plastic wrap, then place them in a freezer-safe bag or container. They can be frozen for up to 2-3 months.
- Freezing (Unbaked Dough): You can also freeze unbaked biscuit dough. Cut out your biscuits and arrange them on a baking sheet. Freeze until solid, then transfer the frozen biscuits to a freezer-safe bag or container. They can be frozen for up to 1 month. When ready to bake, place frozen biscuits on a baking sheet and bake at the same temperature, adding a few extra minutes to the baking time (usually 15-20 minutes total).
Reheating
- Oven (Best Method): This is the ideal way to reheat biscuits, as it helps restore their crispy exterior and fluffy interior. Preheat your oven to 350°F (175°C). Place biscuits directly on a baking sheet and heat for 5-10 minutes, or until warmed through. If reheating from frozen, this may take 15-20 minutes.
- Toaster Oven: A toaster oven works well for one or two biscuits. Heat at 350°F (175°C) for 3-5 minutes.
- Microwave (Use with Caution): While quick, the microwave can make biscuits soft and chewy, sometimes even rubbery. If using, heat for 15-30 seconds, checking frequently, and be aware that the texture won’t be as good as oven-reheated.
- Air Fryer: Preheat your air fryer to 325°F (160°C). Place biscuits in a single layer and heat for 3-5 minutes, checking for warmth and crispness.
Frequently Asked Questions
Why are my biscuits tough?
Tough biscuits are almost always a result of overmixing the dough. When you overmix, you develop the gluten in the flour, which creates a chewy, bread-like texture rather than the desired tender, flaky crumb. To avoid this, mix the dough only until the ingredients are just combined and no dry streaks of flour remain. A shaggy, slightly sticky dough is perfectly fine.
Can I make these biscuits dairy-free?
Yes, you can! To make Yonker Biscuits dairy-free, substitute the buttermilk with a dairy-free alternative like unsweetened plain almond milk or soy milk (you’ll still want to add a tablespoon of lemon juice or apple cider vinegar to curdle it, mimicking buttermilk). For the butter, use a good quality plant-based butter alternative or simply use vegetable oil as specified in the recipe. Ensure your self-rising flour doesn’t contain any hidden dairy ingredients, though most don’t.
What’s the difference between self-rising flour and all-purpose flour for biscuits?
Self-rising flour is a pre-mixed convenience flour that already contains baking powder and salt. This means you don’t need to add these leavening agents separately, simplifying the recipe and helping ensure a consistent rise. All-purpose flour, on the other hand, is plain flour and requires you to add baking powder and salt (and sometimes baking soda) to achieve the desired leavening. Using self-rising flour, especially a soft wheat variety like White Lily, is often preferred for biscuits because it tends to produce a more tender and lighter texture.
My biscuits didn’t rise much. What went wrong?
Several factors can contribute to flat biscuits. The most common culprits include: using old or expired self-rising flour (the leavening agents lose potency over time), overmixing the dough (which inhibits rise), twisting the biscuit cutter (which seals the edges and prevents expansion), or not having your oven hot enough. Ensure your flour is fresh, handle the dough gently, cut straight down, and verify your oven temperature with an oven thermometer for best results.