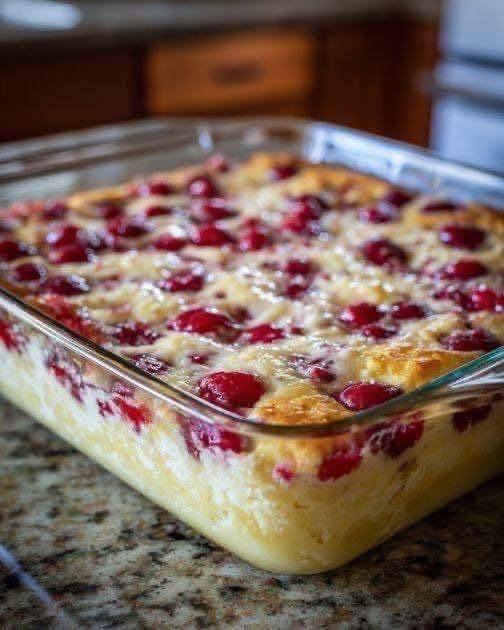
Introduction
There’s an undeniable magic that fills a home when fresh bread is baking. The aroma, a comforting blend of sweet yeast and rich butter, is enough to draw anyone into the kitchen. But what if that homemade loaf could not only rival, but surpass, the offerings of your favorite bakery? Prepare to discover the secret to truly exceptional bread with our Warm Butter Yeast Bread recipe. This isn’t just any bread; it’s a testament to the simple joy of baking, delivering a taste and texture experience that store-bought simply can’t replicate.
Our Warm Butter Yeast Bread is a celebration of all things comforting. Imagine tearing into a warm, golden crust to reveal an impossibly soft, airy crumb, rich with the subtle sweetness of butter. Each bite melts in your mouth, offering a delightful chewiness that speaks of perfectly developed gluten and a slow, loving rise. It’s the kind of bread that elevates a simple meal, transforms breakfast toast into a luxurious treat, and makes an ordinary sandwich feel extraordinary. Forget dense, dry store-bought loaves; this recipe promises a bread so tender and flavorful, you’ll wonder why you ever bought it from a shelf.
What makes this bread truly “better than bakery”? It’s the freshness, for one. Straight from your oven, still warm, it possesses a vitality and aroma that diminishes rapidly in commercial products. It’s also about control – control over quality ingredients, ensuring no artificial additives or preservatives. Plus, there’s the undeniable satisfaction and pride that comes from creating something so delicious with your own hands. This recipe guides you through the process, demystifying yeast and kneading, empowering you to bake a loaf that is not just food, but a warm, buttery embrace.
Nutritional Information
Per serving (approximate values for 1/12 of a loaf):
- Calories: 250
- Protein: 7g
- Carbohydrates: 40g
- Fat: 7g
- Fiber: 2g
- Sodium: 280mg
Ingredients
- 1 cup (240ml) warm milk (105-115°F / 40-46°C)
- 2 ¼ teaspoons (7g) active dry yeast (one standard packet)
- ¼ cup (50g) granulated sugar, plus 1 teaspoon
- ½ cup (113g) unsalted butter, melted and cooled slightly, plus 2 tablespoons for brushing
- 1 teaspoon salt
- 1 large egg, lightly beaten
- 3 ½ to 4 cups (420-480g) all-purpose flour, plus more for dusting
Instructions
- Activate the Yeast: In a large bowl or the bowl of a stand mixer, combine the warm milk, 1 teaspoon of granulated sugar, and the active dry yeast. Stir gently and let it sit for 5-10 minutes until foamy. This indicates the yeast is active and alive.
- Combine Wet Ingredients: To the yeast mixture, add the remaining ¼ cup granulated sugar, ½ cup melted butter, salt, and the lightly beaten egg. Whisk everything together until well combined.
- Add Flour: Gradually add 3 ½ cups of the flour to the wet ingredients, mixing with a wooden spoon or the dough hook attachment of your stand mixer on low speed. Mix until a shaggy dough forms.
- Knead the Dough: If using a stand mixer, increase the speed to medium-low and knead for 7-10 minutes, or until the dough is smooth, elastic, and pulls away from the sides of the bowl. If kneading by hand, turn the dough out onto a lightly floured surface and knead for 10-15 minutes, adding small amounts of flour as needed (up to an additional ½ cup) until the dough is no longer sticky and passes the “windowpane test” (you can stretch a small piece thin enough to see light through it without tearing).
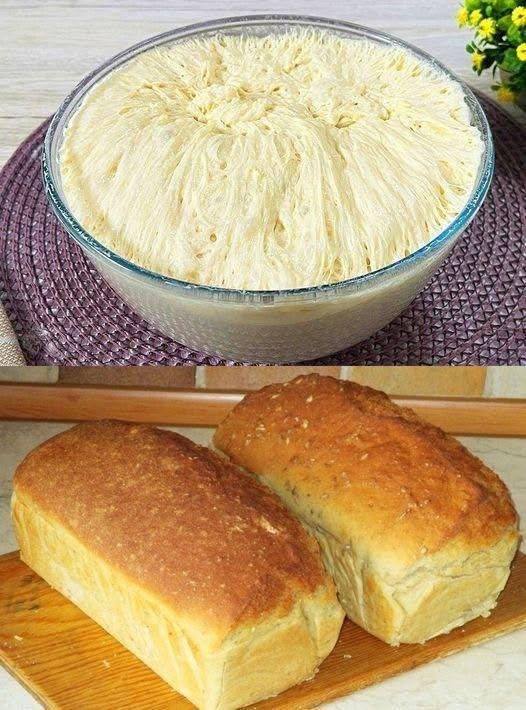
- First Rise (Bulk Fermentation): Lightly grease a large bowl with a little oil. Transfer the kneaded dough to the bowl, turning it once to coat the top. Cover the bowl tightly with plastic wrap or a clean kitchen towel. Place the bowl in a warm, draft-free place (like a turned-off oven with the light on) and let it rise for 1 to 1 ½ hours, or until doubled in size. The dough should look light, airy, and bubbly, much like the image provided.
- Punch Down and Shape: Gently punch down the risen dough to release the air. Turn the dough out onto a lightly floured surface. Divide the dough into two equal portions for two standard loaves, or one larger portion for a single large loaf. To shape each loaf, gently flatten the dough into a rectangle, then roll it up tightly from one of the longer sides, pinching the seam closed. Place the shaped dough seam-side down into a lightly greased 9×5-inch loaf pan. Repeat for the second loaf if making two.
- Second Rise (Proofing): Cover the loaf pans loosely with plastic wrap or a clean kitchen towel. Return them to a warm, draft-free place and let them rise for another 45-60 minutes, or until they have nearly doubled in size and the dough crests above the rim of the pan.
- Preheat Oven: While the loaves are rising for the second time, preheat your oven to 375°F (190°C).
- Bake the Bread: Once the loaves have risen sufficiently, place them in the preheated oven. Bake for 30-35 minutes, or until the tops are golden brown and the internal temperature reaches 200-210°F (93-99°C) when measured with an instant-read thermometer. If the tops are browning too quickly, you can loosely tent them with aluminum foil.
- Cool: Carefully remove the bread from the oven. Immediately brush the tops with the remaining 2 tablespoons of melted butter for extra flavor and a soft crust. Let the loaves cool in their pans for 10-15 minutes before carefully removing them to a wire rack to cool completely. Slicing warm bread can make it gummy, but a truly warm slice with butter is hard to resist!
Cooking Tips and Variations
For the most tender and flavorful bread, always use high-quality ingredients. Fresh active dry yeast is paramount; if your yeast doesn’t foam after step 1, it’s likely dead, and your bread won’t rise. Start over with new yeast. When adding flour, do so gradually. The exact amount of flour can vary depending on humidity and how accurately you measure, so always aim for a dough that is soft and slightly tacky, but not overly sticky. Over-flouring will result in a dry, dense loaf.
Achieving the perfect rise is key to a light and airy crumb. A warm, draft-free environment is crucial for yeast activity. If your kitchen is cool, you can create a proofing box by placing the covered dough in a turned-off oven with just the oven light on, which generates enough gentle warmth. Alternatively, you can place the bowl in a larger bowl of warm water. Don’t rush the rising process; let the dough take its time to double in size. An under-proofed dough will result in a denser loaf, while an over-proofed dough can collapse during baking.
To vary this recipe, consider incorporating different flavors. For a savory twist, knead in 1-2 tablespoons of dried herbs like rosemary or thyme, or a cup of shredded cheddar cheese. For a sweeter loaf, add a teaspoon of cinnamon and ½ cup of raisins or dried cranberries during the last few minutes of kneading. Before baking, you can brush the top with an egg wash (one egg beaten with a tablespoon of water) for an even shinier, deeper golden crust, and sprinkle with a pinch of flaky sea salt or sesame seeds for added texture and flavor.
Proper kneading is another cornerstone of great bread. It develops the gluten strands that give bread its structure and elasticity. If kneading by hand, be patient and persistent. You’ll feel the dough transform from shaggy and sticky to smooth, elastic, and resilient. The “windowpane test” is a reliable indicator that gluten is sufficiently developed. For stand mixer users, ensure your dough hook reaches all parts of the dough, scraping down the sides of the bowl as needed.
Finally, resist the urge to slice the bread too soon after it comes out of the oven. While a warm slice is heavenly, the bread continues to cook and set as it cools. Slicing too early can release steam too quickly, leading to a gummy texture. Allowing it to cool completely on a wire rack ensures the crumb sets properly, resulting in that perfect, fluffy interior.
Storage and Reheating
This Warm Butter Yeast Bread is best enjoyed on the day it’s baked, especially while still slightly warm. However, if you have leftovers, they can be stored to maintain freshness. Once completely cooled, wrap the loaf tightly in plastic wrap, then place it in a large airtight bag or container. It will stay fresh at room temperature for 2-3 days. For longer storage, you can freeze the bread. Slice the cooled loaf, then arrange the slices in a single layer on a baking sheet and freeze for about an hour until firm. Transfer the frozen slices to a freezer-safe bag, removing as much air as possible. The bread can be frozen for up to 3 months.
To reheat, if starting from room temperature, you can gently warm individual slices in a toaster or toaster oven until lightly golden and fragrant. For a whole loaf, preheat your oven to 300°F (150°C), wrap the loaf loosely in aluminum foil, and bake for 10-15 minutes, or until warmed through. If reheating from frozen, you can toast individual slices directly from the freezer. For a whole frozen loaf, thaw it overnight in the refrigerator, then warm as described for a room-temperature loaf. Alternatively, you can place a frozen whole loaf (unwrapped) directly into a cold oven, then set the temperature to 350°F (175°C) and bake for 20-30 minutes, or until thawed and warmed through. Brushing with a little melted butter before serving can help revive the crust.
Frequently Asked Questions
My dough didn’t rise. What went wrong?
The most common reason for dough not rising is inactive or dead yeast. Ensure your milk is warm (105-115°F / 40-46°C); too hot will kill the yeast, too cold won’t activate it. Always check the expiration date on your yeast, and if it doesn’t foam after 5-10 minutes in the warm milk and sugar mixture, discard it and start with fresh yeast. Another factor could be a cold environment; yeast needs warmth to thrive.
Can I make this bread ahead of time?
Absolutely! You can prepare the dough through the first rise. After the first rise, punch down the dough, shape it into loaves, and place them in greased loaf pans. Cover the pans tightly with plastic wrap and refrigerate overnight (up to 18 hours). The next morning, take the pans out of the refrigerator and let them come to room temperature and complete their second rise (this may take 1.5-2 hours) before baking as directed.
Why is my bread dense and heavy?
Density can be caused by several factors. It might be under-kneading, which means the gluten hasn’t fully developed to create a strong structure for the air bubbles. It could also be under-proofing, where the dough hasn’t had enough time to rise sufficiently before baking. Lastly, adding too much flour can make the dough stiff and heavy, preventing it from rising properly and resulting in a dense crumb.