The Ultimate Guide to Making Flaky Homemade Biscuits: Tips, Variations, and Tricks
If you’ve been searching for a delightful, flaky biscuit recipe that captivates your taste buds with every bite, you’ve come to the right place! Homemade biscuits are a quintessential comfort food, perfect for breakfast, brunch, or as a side dish with your favorite meals. In this comprehensive guide, we will walk you through the process of making irresistibly flaky biscuits from scratch, including detailed instructions, variations, and tips for achieving biscuit perfection.
Why Make Homemade Biscuits?
Homemade biscuits are a wonderful addition to any meal. Let’s explore some reasons why you should dive into biscuit-making:
- Freshness: There’s nothing quite like the aroma of freshly baked biscuits filling your kitchen. Making them at home ensures you enjoy their full flavor.
- Customizability: You can adjust ingredients, add herbs, cheese, or spices, and create a biscuit that fits your taste perfectly.
- Healthier Option: Baking at home allows you to control the ingredients, making them healthier than store-bought options.
- Cost-Effective: Homemade biscuits often cost less than their store-bought counterparts, especially when made in bulk.
Understanding the Basics of Biscuit Making
Before we jump into the recipe, let’s cover some fundamental concepts about biscuit-making, which will help you achieve the best results.
Key Ingredients
- Flour: All-purpose flour is commonly used for its balance of protein. For flakier biscuits, you can experiment with cake flour or biscuit flour.
- Fat: Unsalted butter is a traditional choice for biscuits, but you can also use shortening or lard for a different texture. The fat needs to be cold to create a flaky texture.
- Leavening Agents: Baking powder and/or baking soda help your biscuits rise. Ensure they are fresh for maximum effectiveness.
- Milk or Buttermilk: Dairy adds moisture and flavor. Buttermilk can also add a slight tang and tenderness.
- Salt & Sugar: Salt enhances flavor, while sugar can contribute to browning and sweetness, albeit in small amounts.
Classic Fluffy Biscuit Recipe
Now, let’s dive into the steps to create classic flaky biscuits.
Ingredients
- 2 cups all-purpose flour
- 1 tablespoon baking powder
- 1 teaspoon salt
- 1 tablespoon granulated sugar
- 1/2 cup unsalted butter, cold and cubed
- 3/4 cup milk or buttermilk, cold
Step-by-Step Instructions
- Preheat the Oven: Start by preheating your oven to 450°F (230°C). This high temperature ensures the biscuits rise quickly.
- Mix Dry Ingredients: In a large mixing bowl, whisk together the flour, baking powder, salt, and sugar until evenly combined.
- Cut in the Butter: Using a pastry cutter or your fingertips, cut the cold butter into the flour mixture until it resembles coarse crumbs. It’s essential to keep the butter cold for flaky layers.
- Add the Liquid: Make a well in the center of the flour mixture and pour in the cold milk or buttermilk. Stir gently with a fork until just combined. Avoid overmixing; a lumpy dough is desirable.
- Shape the Dough: Turn the dough out onto a floured surface. Gently knead the dough 4-5 times until it holds together. Flatten it into a rectangle about 1-inch thick.
- Fold and Roll: For extra flakiness, fold the dough in half and roll it out again. Repeat this process 2-3 times.
- Cut the Biscuits: Use a floured biscuit cutter or a glass to cut out biscuits. Press straight down without twisting to help them rise evenly.
- Arrange on a Baking Sheet: Place the cut biscuits close together on a baking sheet lined with parchment paper. This encourages soft sides.
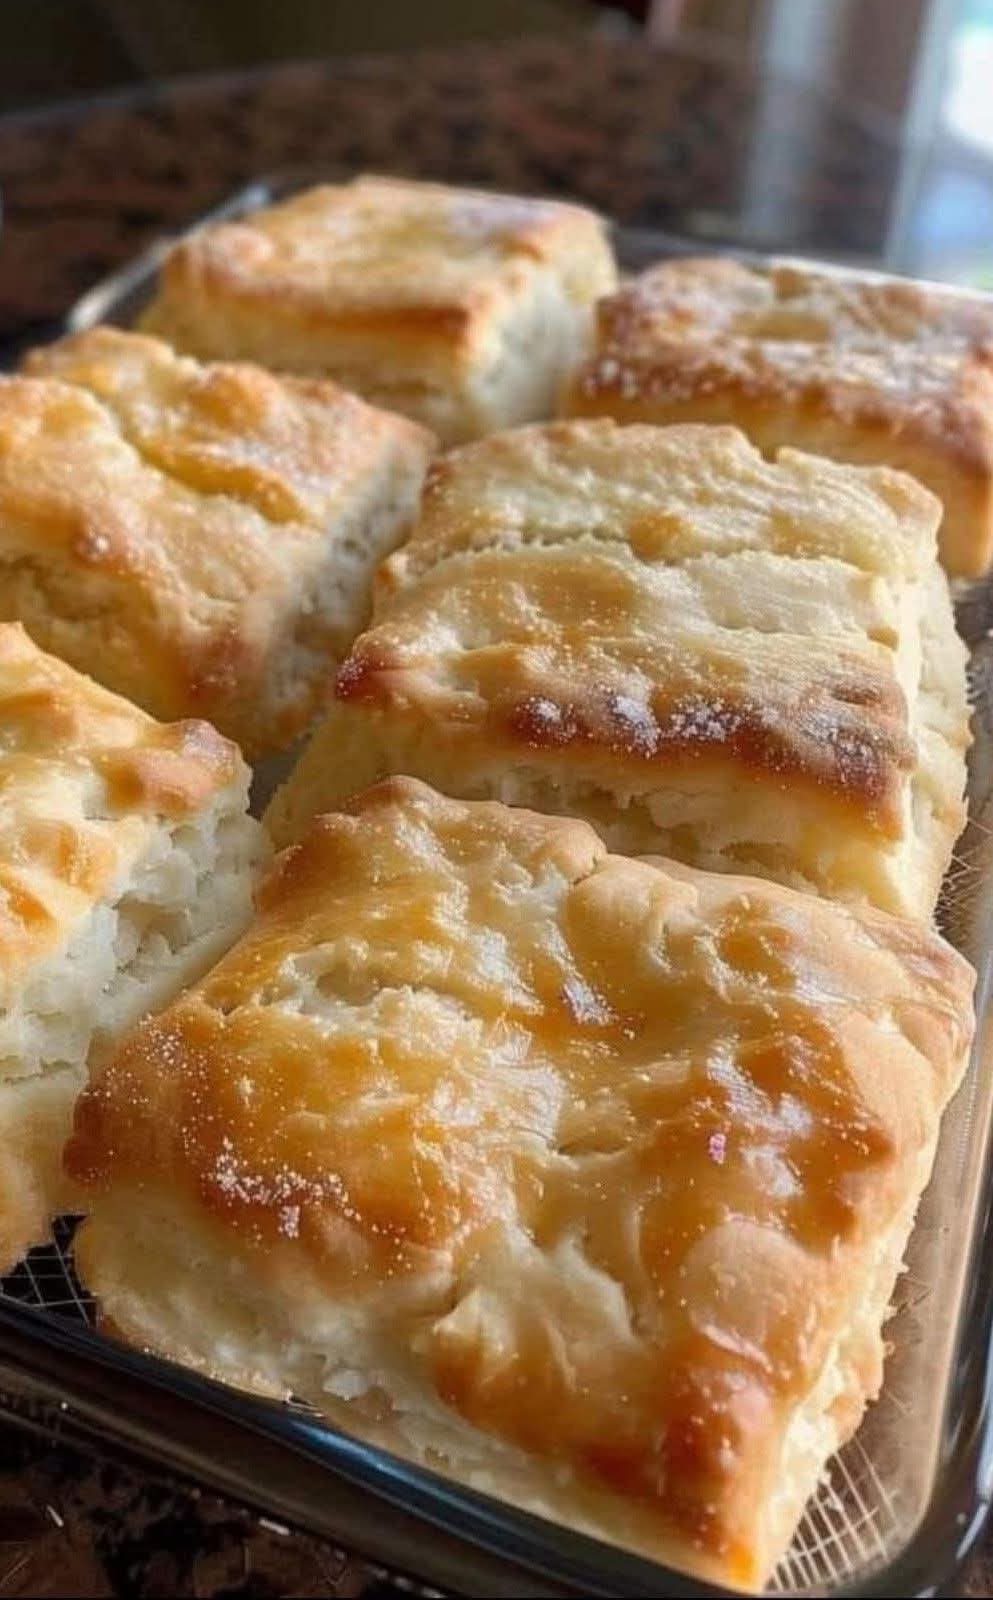
- Bake: Bake in the preheated oven for 12-15 minutes, or until golden brown on top.
- Cool and Serve: Allow the biscuits to cool for a few minutes on a wire rack. Serve warm with butter, jam, or gravy.
Tips for Perfect Biscuits
- Keep Everything Cold: Ensure all your ingredients, especially the butter and liquid, are cold. This helps create those desirable flaky layers.
- Do Not Overwork the Dough: Overworking the dough can lead to tough biscuits. Mix just until combined.
- Use Fresh Leavening Agents: Expired baking powder or baking soda can prevent your biscuits from rising properly.
Variations of Biscuit Recipes
- Cheddar and Chive Biscuits: Add 1 cup of shredded sharp cheddar cheese and 1/4 cup chopped fresh chives to the dry ingredients for a savory twist.
- Herb and Garlic Biscuits: Mix in 2 teaspoons of dried herbs (like rosemary or thyme) and 1 teaspoon of garlic powder to the dry ingredients for a fragrant addition.
- Sweet Cinnamon Biscuits: Add 1/4 cup of sugar and 1 teaspoon of cinnamon for a sweet breakfast biscuit. Drizzle with icing after baking for a treat.
- Whole Wheat Biscuits: Replace half of the all-purpose flour with whole wheat flour for a nuttier flavor and added nutrients.
- Gluten-Free Biscuits: Use a cup-for-cup gluten-free flour substitute and make sure the baking powder is gluten-free as well.
Frequently Asked Questions (FAQs)
How do I store leftover biscuits?
Store biscuits at room temperature in an airtight container for up to 2 days. For longer storage, freeze them in a sealed container for up to 3 months.
How can I reheat biscuits?
To reheat, place biscuits in a 350°F (175°C) oven for about 10 minutes or until warmed through. You can also microwave them for about 15-20 seconds.
Can I make biscuit dough ahead of time?
Yes! You can prepare the dough ahead of time and freeze it. Just cut the biscuits and place them on a baking sheet to freeze. Once frozen solid, transfer them to a freezer bag. Bake them from frozen, adding a couple of extra minutes to the baking time.
Final Thoughts
Now that you have all the tools and knowledge to create delicious homemade biscuits, it’s time to get baking! Whether you choose the classic recipe or one of the exciting variations, these biscuits are sure to be a hit at your table. Enjoy the satisfaction of baking from scratch, and don’t forget to share your creation with friends and family—they will taste the love and effort in every bite! Happy baking!