Sourdough Sandwich Bread – Soft, Tangy & Perfect for Daily Toast
There’s nothing quite like the comfort of a homemade loaf of sourdough bread, especially when it turns out soft, fluffy, and full of that signature tang. This sourdough sandwich bread recipe strikes the perfect balance between artisan flavor and everyday practicality. It’s easy enough for beginners yet impressive enough to make you swear off store-bought bread forever. If you’ve ever dreamed of making sourdough that’s tender enough for sandwiches and toast yet still loaded with that deep, fermented flavor—this recipe is for you.
Sourdough baking has been cherished for centuries because it relies on natural fermentation rather than commercial yeast. That process gives your bread an incredible aroma, chewy crumb, and better digestibility. This sourdough sandwich bread keeps all the charm of traditional sourdough but softens things up for a smooth, sliceable texture that’s perfect for daily use—whether you’re making toast with butter and jam or crafting a loaded grilled cheese.
What Makes This Sourdough Sandwich Bread Special
Most sourdough loaves have a rustic crust and open crumb that make them better for dipping in soup than spreading with peanut butter. But this recipe takes a slightly different approach—it’s designed for softness and structure. The combination of active sourdough starter, warm water, and a touch of olive oil yields a loaf that’s still naturally leavened but far more tender.
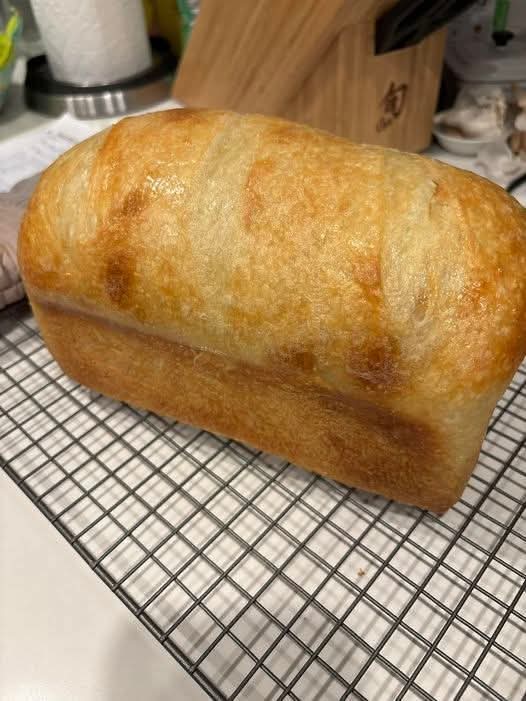
The long fermentation period (an overnight rest works beautifully) develops deep flavor while keeping the process low-maintenance. The next day, you simply shape, rise, and bake. The result? A beautifully golden loaf with a delicate crust, mild tang, and the kind of crumb that slices cleanly without crumbling.
This recipe is also wonderfully adaptable—you can bake it with all-purpose flour for softness or use bread flour for a bit more chew. Either way, it’s the kind of loaf you’ll want to keep on your counter all week.
Ingredients You’ll Need
- 1 cup active sourdough starter (fed and bubbly)
- 1 1/4 cups warm water
- 3 1/2 cups all-purpose or bread flour
- 1 1/2 teaspoons salt
- 1 tablespoon olive oil (optional, for a softer crust)
That’s it—five simple ingredients, no commercial yeast, and no fancy equipment required. Just patience, love, and a good starter.
Step-by-Step Instructions
Step 1: Mix the Dough
In a large mixing bowl, combine your active sourdough starter with warm water. Stir gently until the starter dissolves into the water, creating a milky, bubbly mixture. Add your flour and salt next, mixing until a shaggy dough forms. It will be sticky at first—that’s normal. Don’t be tempted to add too much flour; the dough will strengthen as it ferments.
If you’re using olive oil, drizzle it in now for extra softness. Mix by hand or with a dough scraper until everything is combined.
Step 2: Autolyse (Rest and Relax)
Cover the bowl with a damp towel or plastic wrap and let the dough rest for 30 minutes. This short break allows the flour to fully absorb the water and begin gluten development naturally, making the dough easier to handle later.
Step 3: Stretch and Fold
After resting, it’s time to build strength. Perform a series of “stretch and folds” by grabbing one edge of the dough, pulling it up, and folding it over itself. Rotate the bowl and repeat 3–4 times so that each side gets stretched. Do this process every 30 minutes for the next 2 hours.
Each fold will make the dough smoother, stronger, and more elastic—a sign that fermentation is working its magic.
Step 4: Bulk Fermentation (The Overnight Rise)
After your last fold, cover the dough again and let it rise at room temperature for 8–10 hours. Overnight is ideal. The dough should double in size and appear airy and domed by morning. You’ll notice small bubbles throughout, a sign that the natural yeast is active and the gluten network is strong.
Step 5: Shape the Dough
In the morning, lightly grease a loaf pan with butter or oil. Gently deflate your dough and turn it out onto a lightly floured surface. Shape it into a loaf by folding the sides in and rolling it up like a jelly roll. Pinch the seam closed and place it seam-side down in your prepared pan.
Step 6: Final Rise
Cover the loaf with a towel and let it rest for another 1–2 hours, or until it rises slightly above the rim of the pan. The dough should feel puffy but still spring back slowly when touched.
Step 7: Bake
Preheat your oven to 220°C (425°F). Once hot, place your loaf in the oven and bake for 35–40 minutes, or until the crust turns a beautiful golden brown. The bread should sound hollow when tapped on the bottom—a sign it’s done.
Step 8: Cool and Slice
Resist the temptation to slice immediately. Cooling is crucial because it allows the crumb to set and moisture to redistribute. Let it cool completely on a wire rack before cutting into it. The first slice will be pure heaven—soft, springy, and gently tangy.
Why Sourdough Sandwich Bread Is Worth the Effort
Sourdough bread isn’t just about flavor—it’s about nourishment and tradition. The long fermentation process breaks down gluten and starches, making the bread easier to digest. It’s also naturally preserved, meaning your loaf will stay fresh longer without any additives.
This sourdough sandwich bread bridges the gap between rustic artisan loaves and classic soft sandwich bread. You get the best of both worlds: a tender texture ideal for sandwiches and toast, plus the deep, slightly tangy flavor that only sourdough can offer.
Tips for Perfect Sourdough Sandwich Bread
Use an active starter: Your sourdough starter should be bubbly and at its peak activity when you mix the dough. If it’s sluggish, the rise will be slow and the texture dense.
Mind the temperature: Fermentation works best between 21°C and 26°C (70°F–79°F). If your kitchen is cool, extend the rise time or find a warm spot like inside the oven with the light on.
Don’t rush fermentation: The secret to good sourdough is patience. The longer, slower rise enhances both flavor and texture.
Add olive oil or butter for softness: This step is optional but makes a noticeable difference in crust tenderness and shelf life.
Store it right: Once cooled, store your sourdough sandwich bread in a sealed bag or bread box at room temperature for up to 4 days. It also freezes beautifully—slice it first for easy toasting later.
Delicious Ways to Enjoy Sourdough Sandwich Bread
Once you bake this bread, you’ll find endless ways to use it. Here are a few ideas to inspire you:
1. Morning Toast: Top warm slices with butter and honey or jam for a simple, soul-satisfying breakfast.
2. Grilled Cheese Heaven: The tangy sourdough perfectly complements gooey melted cheese. Add tomato or bacon for a gourmet touch.
3. Avocado Toast: Mash ripe avocado with lemon, salt, and chili flakes, then spread it on toasted sourdough for a trendy and nutritious snack.
4. French Toast: This bread’s slightly firm texture makes it ideal for soaking in custard and frying into golden perfection.
5. Sandwiches: Whether it’s turkey and Swiss, egg salad, or BLT, this bread holds fillings beautifully without falling apart.
Variations and Add-Ins
You can easily customize your sourdough sandwich bread to suit your taste. Try adding:
- 1 tablespoon honey or sugar for a hint of sweetness
- 2 tablespoons milk powder for extra softness
- Seeds like sesame, sunflower, or flax for texture
- A sprinkle of oats on top before baking for a rustic touch
- Whole wheat flour (replace 1 cup of all-purpose with whole wheat) for a nutty, hearty flavor
Each variation gives the bread a new personality while preserving the sourdough’s essential character.
Troubleshooting Common Issues
Dense bread: Usually caused by an inactive starter or insufficient fermentation. Make sure your starter is strong and bubbly before use.
Gummy crumb: The bread was sliced too soon. Always let it cool completely before cutting.
Crust too hard: Brush with melted butter right after baking, or include olive oil in your dough for a softer finish.
Flat loaf: Your dough may have over-proofed. Reduce the final rise next time and check earlier.
Health Benefits of Sourdough Bread
Sourdough isn’t just tastier—it’s healthier, too. The fermentation process increases the bioavailability of nutrients like iron, zinc, and magnesium. It also reduces phytates and breaks down gluten, making the bread gentler on digestion. The natural acids in sourdough slow down starch absorption, which can help balance blood sugar levels.
In short, this isn’t just bread—it’s real food that loves you back.
Conclusion: A Loaf Worth Every Minute
This Sourdough Sandwich Bread is the kind of recipe that rewards patience and care. With just flour, water, and time, you create something deeply satisfying—soft, tangy, and versatile enough for every meal. It’s the perfect marriage of tradition and practicality, proof that homemade bread doesn’t have to be hard or intimidating.
Once you try it, you’ll understand why so many home bakers say sourdough changed the way they think about bread. It’s wholesome, flavorful, and wonderfully comforting. And when that first slice hits the toaster, filling your kitchen with that warm, toasty aroma—you’ll know it was all worth it.