After this recipe, you will no longer buy bread, you will make it yourself at home. There is something deeply satisfying about baking your own bread, watching simple ingredients transform into a golden loaf with a crisp crust and a soft, airy interior. This homemade bread recipe is proof that you don’t need complicated techniques, special equipment, or years of experience to enjoy fresh bread straight from your own oven. With just a handful of pantry staples and a little patience, you can create bakery-quality bread that tastes better, smells better, and feels more rewarding than anything you’ll find on a store shelf.
Homemade bread has a way of bringing warmth into the kitchen. The aroma alone makes the effort worthwhile, but the real magic happens when you slice into that loaf and hear the gentle crackle of the crust. This recipe is designed for beginners and busy home cooks alike. It’s reliable, flexible, and forgiving, making it perfect for everyday baking. Once you master this simple bread, it will become a staple in your home.
Why Homemade Bread Is Better Than Store-Bought
Store-bought bread is convenient, but it often lacks flavor and texture. Many commercial loaves are filled with preservatives, additives, and unnecessary sugars. Homemade bread, on the other hand, gives you full control over what goes into your food. You know exactly what you’re eating, and you can adjust the recipe to suit your taste.
This bread recipe uses basic ingredients that work together to create a loaf with real character. The olive oil adds richness, the yeast provides lift, and the flour forms a structure that’s both sturdy and tender. The result is bread that tastes fresh for days and elevates even the simplest meal.
Healthier and More Natural
When you make bread at home, you skip artificial preservatives and excessive sodium. This recipe relies on time and proper technique rather than additives, allowing natural fermentation to develop flavor.
Budget-Friendly and Practical
Homemade bread costs a fraction of what artisan loaves cost at the store. One bag of flour can produce several loaves, making this recipe economical for families or anyone who enjoys fresh bread regularly.
Perfect for Any Meal
This bread works beautifully for sandwiches, toast, dipping into soups, or serving alongside dinner. Its neutral flavor makes it incredibly versatile.
Ingredients for Homemade Bread
This recipe uses only five simple ingredients, yet each one plays an essential role in the final result.
Olive oil adds moisture and a subtle richness that improves both texture and flavor. Dry yeast is the engine of the bread, creating air pockets that give the loaf its rise. Salt balances the flavor and strengthens the dough. Warm water activates the yeast and hydrates the flour. Plain flour forms the backbone of the bread, providing structure and chew.
These basic ingredients come together to create something far greater than the sum of their parts.
Understanding Yeast and Dough Basics
Before diving into the process, it helps to understand what’s happening behind the scenes. Yeast is a living organism that feeds on sugars in the flour. As it consumes those sugars, it releases carbon dioxide, which causes the dough to rise. Warm water helps wake up the yeast, while salt controls its activity, preventing the dough from rising too quickly.
Kneading develops gluten, a network of proteins that traps air and gives bread its structure. This recipe uses a straightforward kneading method that doesn’t require special skills, just a little time and gentle pressure.
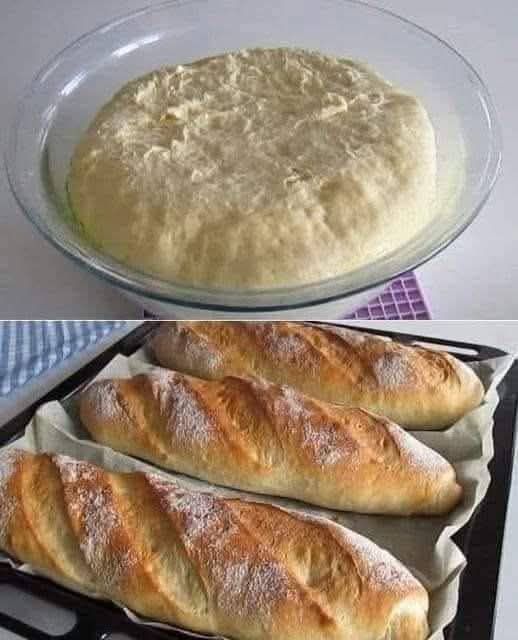
How to Make Homemade Bread Step by Step
Step 1: Activate the Yeast
In a large bowl, combine the warm water and dry yeast. Stir gently and let it sit for several minutes until the mixture becomes foamy. This step ensures the yeast is active and ready to work. If the mixture doesn’t foam, the yeast may be expired or the water may be too hot or too cold.
Step 2: Add Oil and Salt
Once the yeast is activated, add the olive oil and salt. Stir to combine. The oil enriches the dough, while the salt enhances flavor and helps regulate fermentation.
Step 3: Incorporate the Flour
Gradually add the flour, mixing with a spoon or your hands until a shaggy dough forms. The dough should be soft but not sticky. Depending on humidity and flour type, you may need slightly more or less flour.
Step 4: Knead the Dough
Transfer the dough to a lightly floured surface and knead until smooth and elastic. This usually takes about 8 to 10 minutes. Kneading develops gluten, which gives the bread its structure and chew. The dough should spring back slightly when pressed.
Step 5: First Rise
Place the dough in a lightly oiled bowl, turning it once to coat the surface. Cover and let it rise in a warm place until doubled in size. This step allows the yeast to create air pockets, giving the bread its light texture.
Step 6: Shape the Dough
Once risen, gently punch down the dough to release excess air. Shape it into a loaf or divide it into smaller portions if desired. Place it on a baking tray or in a loaf pan, depending on your preference.
Step 7: Second Rise
Cover the shaped dough and let it rise again until slightly puffed. This second rise improves texture and creates a better crumb.
Step 8: Bake the Bread
Bake the bread in a preheated oven until golden brown. The loaf should sound hollow when tapped on the bottom, indicating it’s fully baked. Let it cool slightly before slicing.
Tips for Perfect Homemade Bread
Use warm, not hot, water to activate the yeast. Water that’s too hot can kill the yeast, while water that’s too cold won’t activate it properly. Measure flour accurately to avoid dense bread. Don’t rush the rising process, as time is essential for flavor development. Let the bread cool before slicing to allow the crumb to set.
Common Bread Baking Mistakes and How to Avoid Them
Dense bread is often caused by under-kneading or inactive yeast. Flat bread can result from over-proofing or insufficient structure. Pale crust may mean the oven temperature is too low. Paying attention to these details ensures consistent success.
Variations You Can Try
Rustic Olive Oil Bread
Increase the olive oil slightly for a richer, softer crumb that’s perfect for dipping.
Garlic and Herb Bread
Add minced garlic and dried herbs to the dough for a flavorful variation that pairs well with pasta and soups.
Seeded Bread
Mix in sunflower seeds, sesame seeds, or flaxseeds for added texture and nutrition.
Whole Wheat Option
Replace part of the plain flour with whole wheat flour for a heartier loaf. Increase water slightly to compensate for absorption.
How to Store Homemade Bread
Store the bread at room temperature in a bread box or wrapped in a clean kitchen towel. Avoid refrigeration, as it dries out bread. For longer storage, slice and freeze the loaf, then toast slices as needed.
Why This Bread Recipe Works
This recipe succeeds because it balances simplicity with proper technique. The ingredient ratios are reliable, the method is forgiving, and the result is consistently delicious. It teaches the fundamentals of bread baking without overwhelming the baker.
Serving Ideas
Serve this bread warm with butter, olive oil, or honey. Use it for sandwiches, toast it for breakfast, or pair it with soups and stews. It’s also excellent for bruschetta or homemade croutons.
Frequently Asked Questions
Can I make this bread without olive oil? Yes, but the oil improves texture and flavor. Can I use instant yeast instead of dry yeast? Yes, but reduce activation time. Can I bake this bread in a Dutch oven? Absolutely, for a crispier crust.
Final Thoughts
This homemade bread recipe is more than just a way to make food; it’s a skill that changes how you approach your kitchen. Once you experience the taste and satisfaction of baking your own bread, store-bought loaves will never compare. With just five simple ingredients and a little care, you can create fresh, delicious bread anytime you want. This is the kind of recipe that becomes part of your routine, passed down, shared, and enjoyed again and again.