Discover “Crispy Heaven”: The 3-Ingredient Snack Everyone Raves About
When it comes to simple yet delicious snacks, nothing beats the delightful experience of digging into a plate of “Crispy Heaven.” This delicious treat requires just three ingredients and a frying pan, making it an ideal choice for quick bites, party appetizers, or even a satisfying late-night snack. In this comprehensive guide, we will walk you through everything you need to know about making this sensational snack, from its preparation and variations to tips for perfecting each bite. Let’s embark on this culinary adventure and learn how to make “Crispy Heaven” the star of your kitchen!
Table of Contents
- Introduction
- The Recipe: “Crispy Heaven”
- Ingredients
- Instructions
- Tips for Achieving the Perfect Crisp
- Variations on the Classic Recipe
- Flavor Enhancements
- Ingredient Swaps
- Serving Suggestions
- Frequently Asked Questions (FAQs)
- Conclusion
- Call to Action
1. Introduction
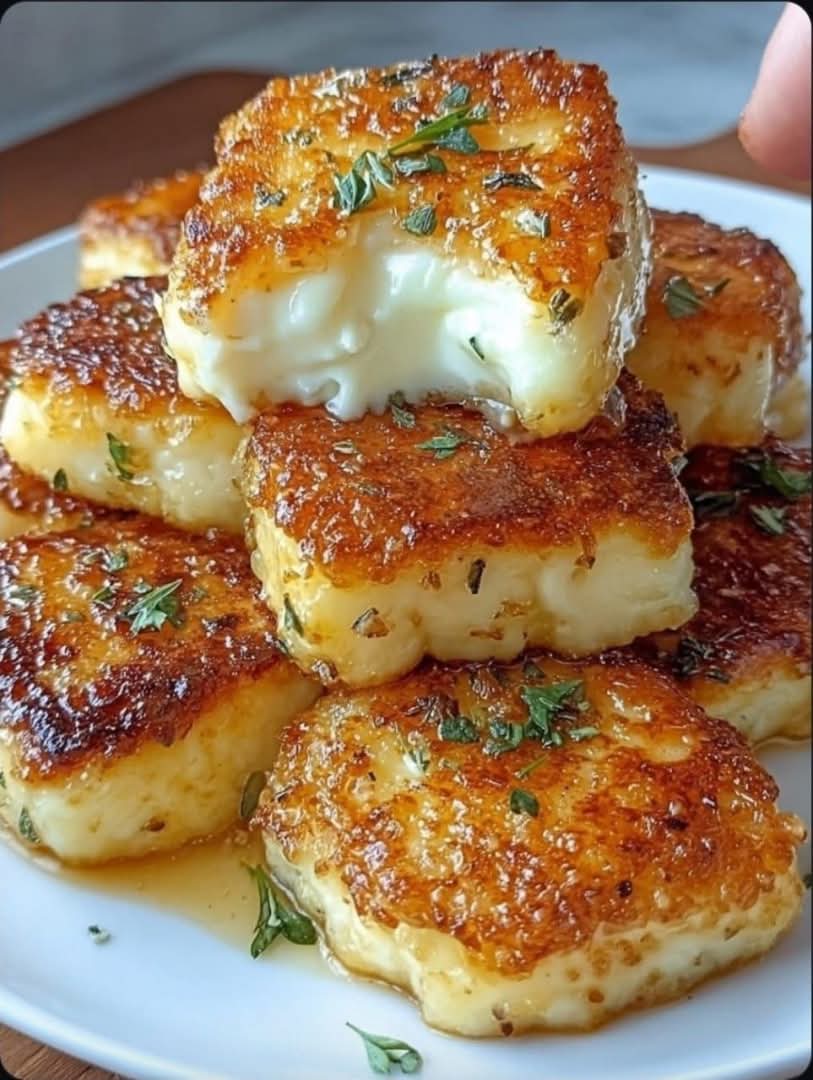
It’s no secret that the best meals often come together with the simplest ingredients. “Crispy Heaven” is one such dish that embodies this philosophy effortlessly. With just three primary ingredients—your choice of cheese, a binder, and an oil for frying—you can create a snack that results in a crispy exterior while revealing a gooey, indulgent center. Everyone who tries this dish raves about its flavors and textures, making it a beloved recipe in households far and wide.
Whether you share it with friends, serve it at a gathering, or whip it up for yourself, “Crispy Heaven” will keep you coming back for more!
2. The Recipe: “Crispy Heaven”
Let’s dive right into the details. Here’s how to make “Crispy Heaven” step by step.
Ingredients
To achieve perfect “Crispy Heaven,” you’ll need the following essential ingredients:
- Cheese (your choice, e.g., mozzarella, cheddar, or a combination)
- Binder (commonly flour, cornstarch, or breadcrumbs)
- Oil (for frying; vegetable or olive oil works best)
Optional: Fresh herbs or spices for added flavor (e.g., garlic powder, dried oregano, crushed pepper flakes).
Instructions
Step 1: Prepare the Ingredients
- Choose Your Cheese: Opt for a cheese that melts well; mozzarella offers a classic stretchy texture, while cheddar gives a sharp flavor.
- Prepare the Binder: In a mixing bowl, combine about ½ cup of your chosen binder (flour, cornstarch, or breadcrumbs).
- Cube the Cheese: Cut the cheese into bite-sized cubes or thin slices. This ensures even melting and a perfect shape for frying.
Step 2: Heat the Oil
- Preheat the Oil: In a frying pan, add enough oil to cover the base (around ¼ inch deep). Heat over medium-high heat until shimmering.
Step 3: Coat and Fry
- Coat the Cheese: Roll the cheese cubes in the binder until evenly coated, ensuring no bare spots. Shake off any excess.
- Fry the Cheese: Carefully add the coated cheese to the hot oil, ensuring not to overcrowd the pan. Fry for about 2-3 minutes per side or until golden brown.
Step 4: Drain and Serve
- Drain Excess Oil: Once crispy, remove the cheese from the pan and place it on a plate lined with paper towels to absorb excess oil.
- Enjoy: Serve immediately while hot and melty! A sprinkle of herbs or a dash of your favorite sauce can elevate the presentation and taste.
3. Tips for Achieving the Perfect Crisp
To achieve that perfect crispy outer layer with a gooey center, keep these tips in mind:
- Temperature Control: Make sure the oil is hot enough before adding the cheese. If it’s too cold, the cheese will absorb oil instead of frying.
- Coating Technique: Ensure an even coat by pressing the binder onto the cheese firmly but gently. This helps form a beautiful crust.
- Avoid Overcrowding: Fry in batches if necessary. Crowding the pan can lower the oil temperature, resulting in soggy bites.
- Serve Fresh: “Crispy Heaven” is best enjoyed straight out of the pan when it’s freshly fried and hottest.
4. Variations on the Classic Recipe
Crispy Heaven can be easily customized to suit your taste. Here are some variations to try:
Flavor Enhancements
- Garlic and Herb: Add garlic powder and Italian herbs to the binder for a flavorful kick.
- Spicy Option: Toss in some crushed red pepper flakes or jalapeño slices in the cheese filling for added heat.
Ingredient Swaps
- Different Cheeses: Experiment with different cheeses like pepper jack for a spicy twist or gorgonzola for a tangy flavor.
- Alternative Binders: Replace flour with gluten-free alternatives like almond flour or oat flour to suit dietary restrictions.
5. Serving Suggestions
These crispy bites are versatile and can be served in various ways:
- Dipping Sauces: Pair with marinara sauce, ranch dressing, or spicy aioli. The contrasting flavors will complement the crunchy nature of the bites.
- Garnishes: Top with finely chopped herbs like parsley or chives for a touch of freshness and visual appeal.
- As Part of a Platter: These bites can be included on a charcuterie board alongside cured meats, olives, and assorted cheeses for an impressive spread.
6. Frequently Asked Questions (FAQs)
Can I make a larger batch in advance?
You can prepare the cheese-coated bites ahead of time and store them in the refrigerator. Fry them just before serving for the best results.
Can I bake instead of frying?
While frying offers the best crunch, you can bake the cheese bites at 400°F (200°C) for about 15-20 minutes. Just ensure the cheese is well-coated before baking to achieve crispy results.
What is the best cheese for this recipe?
Mozzarella is the most popular choice when seeking a stretch and gooey center, but feel free to try various cheeses to match your preferences!
7. Conclusion
Crispy Heaven is a testament to how minimal ingredients can create extraordinary flavors. With only three main components, you possess the power to whip up a quick snack or a party favorite that will leave everyone raving. It’s a true culinary delight that can be customized to your taste preferences, making it a versatile addition to any gathering.
Once you taste these crispy bites, you’ll understand why they’re dubbed “Crispy Heaven.” They’re an easy-to-make treat perfect for sharing, snacking, or even indulging in solo.
8. Call to Action
Ready to take your snacking game to new heights? Don’t wait! Gather your ingredients and try making “Crispy Heaven” for yourself today. Share your creations and variations on social media. And if you enjoy this recipe, be sure to follow us for more delicious dishes that anyone can create at home!