Introduction
Prepare to have your dessert dreams come true with this unbelievably simple, yet utterly decadent, 2-ingredient creamy dessert! In a world where elaborate recipes often dominate, sometimes all you need is a quick fix that doesn’t compromise on flavor or texture. This recipe delivers exactly that: a luscious, smooth, and satisfying treat that comes together in just three simple steps, making it the ultimate go-to for busy weeknights, impromptu gatherings, or whenever a sweet craving strikes.
What makes this dessert truly special is its incredible ease and accessibility. You don’t need any special equipment, advanced cooking skills, or a pantry full of obscure ingredients. Just two humble components transform into a surprisingly sophisticated dessert that tastes like it took hours to prepare. It’s the perfect solution for anyone looking to whip up something delicious without the fuss, whether you’re a seasoned home cook or just starting your culinary journey. Its velvety texture and rich flavor profile make it a crowd-pleaser, and the minimal effort involved means you’ll be enjoying spoonfuls of creamy goodness in no time.
The beauty of this dessert lies in its versatility and pure, unadulterated pleasure. Imagine a dessert so simple, yet so satisfying, that it becomes your secret weapon for impressing guests or simply treating yourself. It’s a no-bake wonder that requires only a bit of mixing and some chilling time, allowing you to focus on enjoying the moment rather than stressing in the kitchen. Get ready to discover your new favorite quick and easy indulgence – a creamy, dreamy dessert that proves sometimes, less truly is more!
Nutritional Information
Per serving (approximate values):
- Calories: 280
- Protein: 5g
- Carbohydrates: 30g
- Fat: 16g
- Fiber: 0g
- Sodium: 120mg
Ingredients
- 8 ounces (226g) full-fat cream cheese, softened
- 14 ounces (397g) sweetened condensed milk
- Optional: 2 tablespoons chocolate sprinkles, for topping
Instructions
- Step 1: Combine the Creamy Duo. In a large mixing bowl, add the softened full-fat cream cheese. Ensure the cream cheese is at room temperature to prevent lumps and make mixing easier. Pour in the entire can of sweetened condensed milk. Using an electric mixer on medium speed, or a whisk and plenty of arm power, beat the cream cheese and condensed milk together until the mixture is completely smooth, lump-free, and thoroughly combined. Scrape down the sides of the bowl occasionally to ensure everything is incorporated. Continue mixing for about 2-3 minutes until the mixture looks light, airy, and has a uniform creamy consistency.
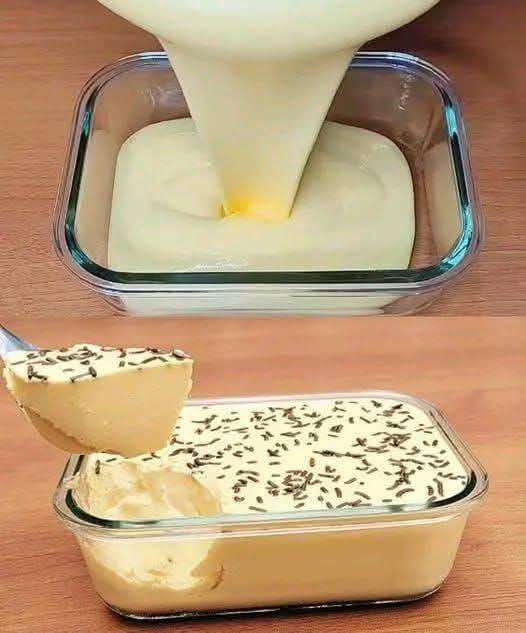
- Step 2: Chill to Perfection. Once the mixture is silky smooth, spoon or pour it into your desired serving dishes. This recipe yields enough for about 4-6 individual servings, depending on the size of your ramekins, small bowls, or glasses. You can also pour it into a single larger serving bowl or a small pie dish. Cover the dishes tightly with plastic wrap to prevent a skin from forming and to keep any refrigerator odors out. Place the covered dessert(s) in the refrigerator and chill for a minimum of 4 hours, or preferably overnight. Chilling is crucial as it allows the dessert to set properly, firm up, and develop its rich, creamy texture. Do not skip or shorten this step!
- Step 3: Garnish and Serve. Once thoroughly chilled and set, remove the dessert from the refrigerator. Just before serving, uncover and, if desired, generously sprinkle the tops with chocolate sprinkles. The sprinkles add a delightful textural contrast and a touch of visual appeal. Serve immediately and enjoy the incredibly rich, smooth, and satisfying taste of this ridiculously easy 2-ingredient dessert.
Cooking Tips and Variations
Tips for Best Results:
- Room Temperature Cream Cheese is Key: This cannot be stressed enough! Cold cream cheese will result in a lumpy mixture, no matter how long you beat it. Take your cream cheese out of the refrigerator at least 30-60 minutes before you plan to mix. If you’re short on time, you can cut the cream cheese into smaller cubes and let it sit for 15-20 minutes, or even gently microwave it for 10-15 seconds (be careful not to melt it).
- Whip Until Smooth: Don’t rush the mixing process. You want the cream cheese and condensed milk to be thoroughly emulsified and completely smooth. This creates the luxurious, creamy texture that makes this dessert so delightful. Use an electric mixer for the easiest and most consistent results.
- Patience with Chilling: The chilling time is non-negotiable for this recipe. It allows the dessert to firm up and achieve its proper set. A dessert that hasn’t chilled long enough will be too runny. Overnight chilling is always best for optimal texture.
- High-Quality Ingredients: While there are only two ingredients, their quality matters. Use a good quality full-fat cream cheese for the best flavor and richest texture.
- Cover During Chilling: Always cover your dessert with plastic wrap while it’s chilling. This prevents a “skin” from forming on the surface and keeps your dessert from absorbing any unwanted odors from the refrigerator.
Variations to Experiment With:
- Fruity Twist:
- Berry Bliss: Swirl in 1/2 cup of berry puree (strawberry, raspberry, or mixed berry) after the initial mixing, or top with fresh berries like sliced strawberries, raspberries, or blueberries just before serving.
- Lemon Zest: Add 1-2 teaspoons of fresh lemon zest to the mixture for a bright, tangy kick. A squeeze of lemon juice (1-2 tablespoons) can also be added, but taste as you go to ensure it doesn’t make the mixture too thin.
- Mango Magic: Fold in 1/2 cup of finely diced fresh mango or mango puree for a tropical flavor.
- Chocolate Lover’s Dream:
- Cocoa Powder: Sift 2-3 tablespoons of unsweetened cocoa powder into the mixture for a chocolatey version. Start with 2 tablespoons and add more to taste.
- Chocolate Chips/Shavings: Fold in mini chocolate chips or sprinkle chocolate shavings on top for extra chocolatey goodness.
- Chocolate Ganache: Drizzle with a simple chocolate ganache just before serving.
- Nutty Indulgence:
- Chopped Nuts: Sprinkle with finely chopped toasted nuts like pecans, walnuts, or almonds for added crunch and flavor.
- Nut Butter Swirl: Gently swirl in a tablespoon or two of melted peanut butter, almond butter, or hazelnut spread after the initial mixing.
- Coffee Kick: Dissolve 1-2 teaspoons of instant espresso powder in 1 tablespoon of hot water, let it cool, then mix it into the cream cheese mixture for a mocha-like flavor.
- Spiced Delight: Add 1/2 teaspoon of ground cinnamon or a pinch of nutmeg for a warm, comforting twist.
- Extract Enhancements: While the basic recipe is delicious on its own, you can add 1 teaspoon of vanilla extract, almond extract, or coconut extract to deepen the flavor profile.
- Crust Creation: For a cheesecake-like experience, press a simple graham cracker crust into the bottom of your serving dishes before adding the cream cheese mixture.
Storage and Reheating
This creamy 2-ingredient dessert is best enjoyed chilled, and it does not require reheating. In fact, reheating would ruin its texture. Proper storage is crucial to maintain its creamy consistency and freshness.
- Refrigeration: Store any leftover dessert in an airtight container or keep the individual serving dishes tightly covered with plastic wrap. Place it in the refrigerator.
- Shelf Life: When stored correctly in the refrigerator, this dessert will remain fresh and delicious for up to 3-4 days. The texture might firm up slightly over time, but it will still be enjoyable.
- Freezing: While you technically can freeze this dessert, it’s generally not recommended. Freezing and thawing can alter the texture of cream cheese, making it a bit grainy or watery. If you do choose to freeze it, place individual servings in freezer-safe containers or wrap them tightly. Thaw overnight in the refrigerator before serving. Be aware that the texture may not be as perfectly smooth as when freshly made.
- Serving Leftovers: Simply remove the desired portion from the refrigerator, unwrap, and serve immediately. No additional preparation is needed.
Frequently Asked Questions
Can I use low-fat cream cheese for this recipe?
While you technically can, it is highly recommended to use full-fat cream cheese for the best results. Low-fat cream cheese has a higher water content and can result in a less creamy, sometimes slightly grainy texture, and may not set as firmly. The richness of full-fat cream cheese is key to achieving the luxurious mouthfeel of this dessert.
Do I have to use an electric mixer?
An electric mixer (handheld or stand mixer) is highly recommended for achieving the smoothest, lump-free consistency with minimal effort. However, if you don’t have one, you can use a sturdy whisk and a good amount of arm power. Just be prepared to whisk for a longer period (5-7 minutes) to ensure the cream cheese is fully incorporated and the mixture is completely smooth.
How long does this dessert need to chill?
The minimum chilling time required for this dessert to set properly is 4 hours. However, for the absolute best results and a perfectly firm, creamy texture, it is highly recommended to chill it overnight (8 hours or more). Rushing the chilling process will result in a softer, looser consistency.