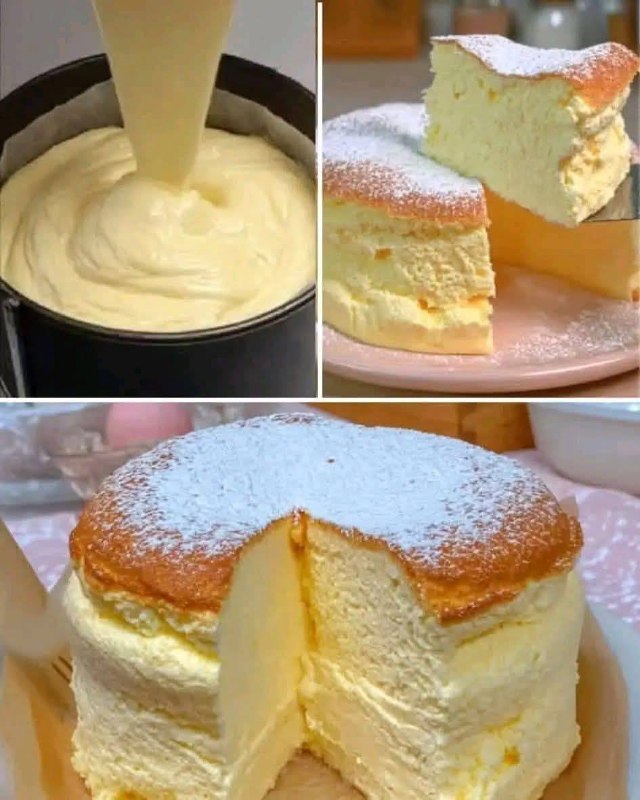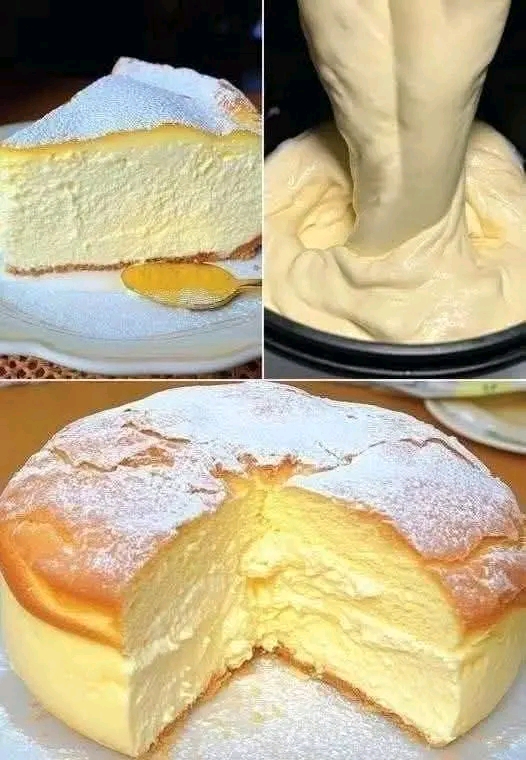
Cloud Cake Recipe | Light, Fluffy & Creamy Cheesecake
This Cloud Cake is soft, airy, and melts in your mouth — like eating a sweet cloud! With just a few ingredients, you can make this dream-like dessert right in your blender. It’s creamy, lightly sweet, and perfect for any occasion.
Ingredients:
- 200g (7 oz) cream cheese, softened
- 50g (3 tbsp) unsalted butter, softened
- 100 ml (7 tbsp) milk
- 4 large eggs, separated
- 70g (⅓ cup) granulated sugar
- 40g (⅓ cup) cake flour (or all-purpose flour)
- 10g (1 tbsp) cornstarch
- 1 tsp vanilla extract
Instructions:
1. Prepare the oven
- Preheat oven to 160°C (320°F).
- Line the bottom of a round baking pan (7 or 8 inches) with parchment paper.
- Wrap the outside of the pan in foil if baking in a water bath.
2. Blend the mixture
- In a blender, combine: cream cheese, butter, milk, egg yolks, sugar (reserve 2 tbsp for later), flour, cornstarch, and vanilla.
- Blend until smooth and creamy.
3. Whip the egg whites
- In a clean bowl, beat egg whites until soft peaks form.
- Gradually add the remaining sugar and beat until stiff peaks form.
4. Combine
- Gently fold the blended mixture into the beaten egg whites using a spatula.
- Mix slowly to keep the batter airy and fluffy.
5. Bake
- Pour the batter into the prepared pan.
- Place the pan inside a larger baking dish and fill it with hot water (about 1 inch deep).
- Bake for 50–60 minutes, or until golden on top and set.
6. Cool
- Turn off the oven, crack the door open slightly, and let the cake cool inside for 10 minutes to prevent cracking.
- Remove and cool completely before removing from the pan.
Serving
Dust with powdered sugar and serve plain or with whipped cream, fresh fruit, or a drizzle of honey.
Tips
- Don’t overmix the batter — gentle folding keeps the texture light.
- Room temperature ingredients make blending smoother.
- For a firmer texture, chill the cake for 2–3 hours before serving.