Introduction
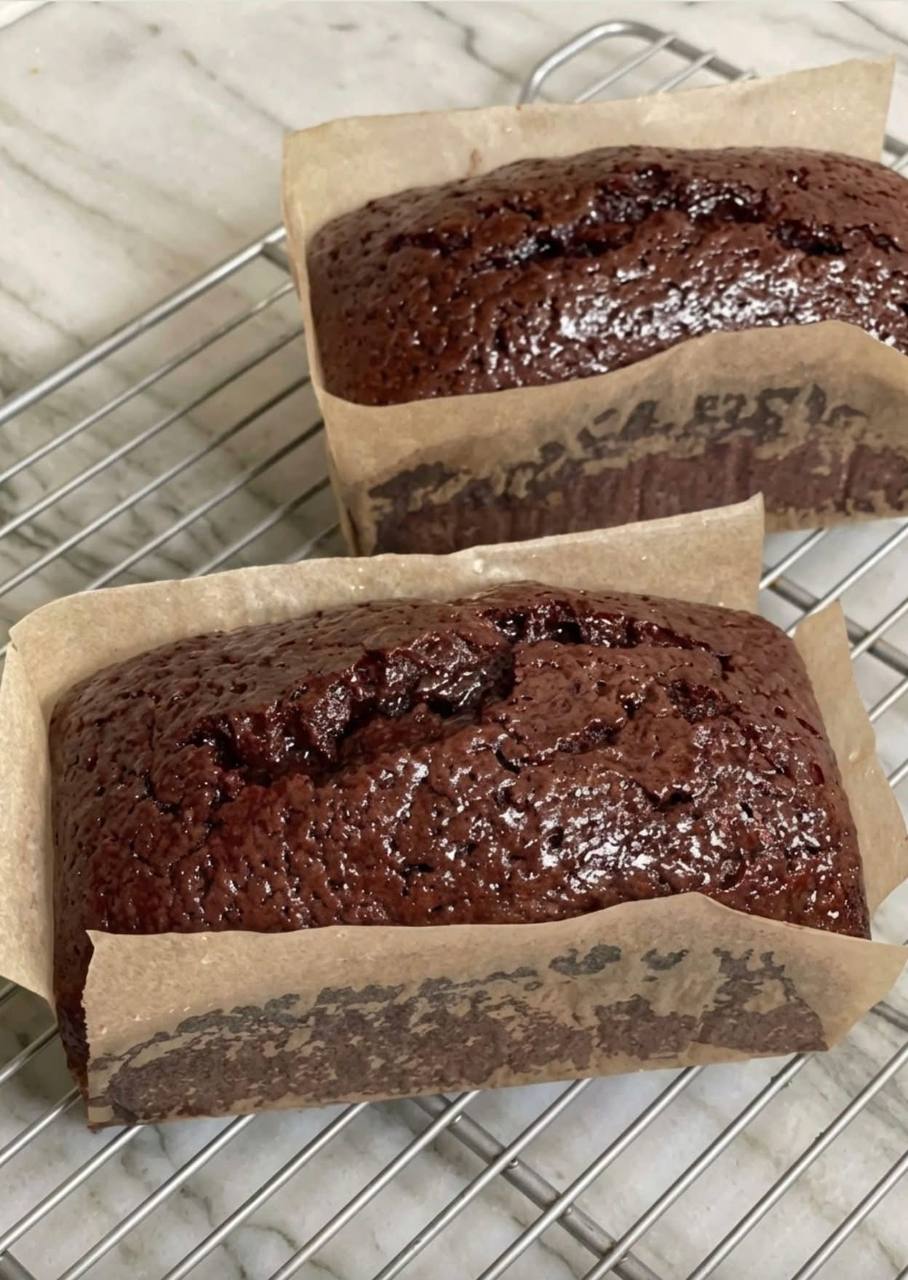
Imagine the rich, intoxicating aroma of deep chocolate filling your kitchen, a scent that promises pure indulgence. That’s the magic of a perfectly baked Chocolate Pound Cake. This isn’t just any cake; it’s a culinary hug, a slice of comfort that’s equally at home gracing a sophisticated dessert table or being devoured for a decadent breakfast. Its popularity stems from its undeniable appeal: a moist, dense crumb packed with intense chocolate flavor, making every bite a luxurious experience.
What sets a pound cake apart is its characteristic density and fine texture, traditionally made with a pound each of butter, sugar, eggs, and flour. While our recipe might adjust those ratios slightly for modern palates and perfect results, it stays true to the spirit of a true pound cake: rich, substantial, and utterly satisfying. This particular Chocolate Pound Cake takes that classic foundation and elevates it with a generous amount of cocoa, ensuring a profound chocolatey depth that will captivate any chocolate lover. It’s a testament to simple ingredients coming together to create something truly extraordinary.
Get ready to embark on a baking adventure that will yield not one, but two glorious loaves of this magnificent Chocolate Pound Cake. Whether you plan to share one with friends, freeze one for a rainy day, or simply keep both all to yourself (we won’t judge!), this recipe is designed for success. Its ease of preparation belies its impressive appearance and exquisite taste, making it a new favorite for both seasoned bakers and eager beginners alike. Prepare to fall in love with the ultimate chocolate treat!
Nutritional Information
Per serving (approximate values):
- Calories: 450
- Protein: 6g
- Carbohydrates: 60g
- Fat: 22g
- Fiber: 3g
- Sodium: 250mg
Ingredients
For the Chocolate Pound Cake:
- 2 cups (4 sticks) unsalted butter, softened
- 3 cups granulated sugar
- 6 large eggs, at room temperature
- 1 teaspoon pure vanilla extract
- 1 cup buttermilk, at room temperature (or 1 cup milk + 1 tablespoon lemon juice/white vinegar, let sit 5 minutes)
- 3 cups all-purpose flour
- 1 cup unsweetened cocoa powder (Dutch-processed recommended for darker color)
- 1 teaspoon baking soda
- 1/2 teaspoon salt
- Optional: 1 cup chocolate chips or chunks (semi-sweet or dark)
- Optional: 1 teaspoon espresso powder (enhances chocolate flavor)
For the Optional Chocolate Glaze:
- 1 cup powdered sugar
- 1/4 cup unsweetened cocoa powder
- 2-4 tablespoons milk or cream, as needed
- 1/2 teaspoon vanilla extract
Instructions
- Prepare Your Pans: Preheat your oven to 325°F (160°C). Grease and flour two 9×5-inch loaf pans. For easy removal, create parchment paper slings by cutting two strips of parchment paper slightly wider than the bottom of your loaf pans and long enough to overhang the sides. Press the parchment into the pans, covering the bottom and two long sides. Grease and flour the exposed short ends of the pans.
- Cream Butter and Sugar: In a large mixing bowl, using an electric mixer on medium speed, cream together the softened butter and granulated sugar until light, fluffy, and pale in color. This usually takes 5-7 minutes. Scrape down the sides of the bowl as needed to ensure even mixing.
- Add Eggs and Vanilla: Add the eggs one at a time, beating well after each addition until fully incorporated. The mixture should remain light and fluffy. Stir in the vanilla extract and optional espresso powder (if using).
- Combine Dry Ingredients: In a separate medium bowl, whisk together the all-purpose flour, unsweetened cocoa powder, baking soda, and salt until well combined.
- Alternate Wet and Dry: With the mixer on low speed, gradually add the dry ingredients to the wet ingredients, alternating with the buttermilk. Begin and end with the dry ingredients. For example, add about one-third of the flour mixture, mix until just combined, then add half of the buttermilk, mix, then another third of the flour, mix, remaining buttermilk, and finally the last third of the flour mixture. Mix until just combined, being careful not to overmix. If using chocolate chips or chunks, gently fold them in by hand at this stage.
- Fill Pans: Divide the batter evenly between the two prepared loaf pans. Smooth the tops with a spatula.
- Bake: Bake for 60-75 minutes, or until a wooden skewer or toothpick inserted into the center of the cakes comes out clean or with moist crumbs attached, but no wet batter. The tops will be domed and may have a slight crack down the center.
- Cool: Let the pound cakes cool in their pans on a wire rack for 15-20 minutes. This allows them to set properly and makes them easier to handle.
- Remove from Pans: Gently lift the cakes out of the pans using the parchment paper slings. Place them directly onto the wire rack to cool completely. Do not slice until fully cooled, as warm pound cake can crumble easily.
- Prepare Optional Glaze (if using): Once the cakes are completely cool, whisk together the powdered sugar, cocoa powder, and vanilla extract in a small bowl. Gradually add milk or cream, one tablespoon at a time, until you reach a smooth, pourable consistency. Drizzle the glaze over the cooled cakes.
Cooking Tips and Variations
For the best Chocolate Pound Cake experience, mastering a few key techniques and understanding ingredient roles is crucial. Firstly, room temperature ingredients are non-negotiable. Softened butter creams beautifully with sugar, incorporating air for a lighter texture, and room temperature eggs and buttermilk emulsify much better into the batter, preventing a curdled appearance and ensuring a smooth, consistent crumb. Cold ingredients can cause the batter to seize and result in a dense, uneven cake. Plan ahead by taking butter, eggs, and buttermilk out of the refrigerator at least an hour before you begin baking.
Do not overmix the batter after adding the flour. Overmixing develops the gluten in the flour, leading to a tough, dry cake. Mix only until the ingredients are just combined and no streaks of flour remain. A good rule of thumb is to stop mixing as soon as the last bit of flour disappears. The beauty of a pound cake is its dense, tender crumb, which can be easily ruined by an overzealous mixer.
Proper pan preparation is vital for easy release and a beautifully shaped cake. While greasing and flouring is standard, using parchment paper slings, as described in the instructions, is a game-changer. These slings act as handles, allowing you to effortlessly lift the cooled cakes from their pans without any sticking or breakage. This simple trick saves you from potential baking heartbreak. Always ensure the entire pan, including the parchment-covered sides and exposed ends, is adequately greased and floured.
Testing for doneness is key to preventing an underbaked or overbaked cake. A wooden skewer or toothpick inserted into the center of the thickest part of the cake should come out clean or with a few moist crumbs attached. If it comes out with wet batter, continue baking in 5-minute increments until done. An overbaked cake will be dry, while an underbaked one will collapse in the center and be gummy. Trust your instincts and the skewer test.
Cooling properly is just as important as baking. Allow the cakes to cool in their pans on a wire rack for 15-20 minutes. This allows the internal structure of the cake to set and prevents it from breaking when removed. Transferring them to a wire rack to cool completely is essential to prevent a soggy bottom, as air circulation ensures even cooling and evaporation of moisture. Resist the urge to slice the cake while it’s still warm, as it will be more prone to crumbling and its texture won’t be fully developed.
Variations:
- Nutty Delight: Fold in 1 cup of toasted chopped pecans or walnuts with the chocolate chips for added crunch and flavor.
- Coffee Lover’s Dream: Increase the espresso powder to 2 teaspoons for a more pronounced mocha flavor. You can also replace a quarter cup of the buttermilk with brewed, cooled strong coffee.
- Zesty Twist: Add the grated zest of one orange to the batter when creaming the butter and sugar. Chocolate and orange are a classic pairing!
- White Chocolate Swirl: Melt 1/2 cup white chocolate and swirl it gently into the batter before baking for a beautiful marbled effect and a different flavor dimension.
- Boozy Bliss: Replace 1/4 cup of the buttermilk with a rich liqueur like Kahlúa, Baileys, or a dark rum for an adult-friendly version.
Storage and Reheating
Proper storage is essential to keep your Chocolate Pound Cake fresh, moist, and delicious for as long as possible. Once the cake has completely cooled, wrap each loaf tightly in plastic wrap, then an additional layer of aluminum foil. This double layer protects it from air exposure, which is the primary cause of staleness.
Stored at room temperature, in an airtight container or properly wrapped, your Chocolate Pound Cake will remain fresh and moist for 3-4 days. For longer storage, the freezer is your best friend. Tightly wrapped as described above, pound cake freezes exceptionally well for up to 3 months. For individual slices, wrap each slice separately before freezing. This allows you to thaw only what you need, reducing waste.
To thaw a frozen pound cake, simply transfer it from the freezer to the refrigerator the night before you plan to serve it, allowing it to thaw slowly. For a quicker thaw, you can leave it wrapped at room temperature for a few hours. Avoid unwrapping it until condensation has dissipated, as this can make the cake soggy.
While delicious at room temperature, a slightly warm slice of Chocolate Pound Cake is pure bliss. To reheat, you can place a slice in the microwave for 15-30 seconds, or wrap it loosely in foil and warm it in a preheated oven at 300°F (150°C) for 5-10 minutes. This gentle warming enhances the chocolate aroma and makes the cake incredibly tender, almost as if it’s freshly baked.
Frequently Asked Questions
What is the difference between a pound cake and a regular cake?
The primary difference lies in their composition and texture. Traditionally, pound cakes are made with a pound each of butter, sugar, eggs, and flour, resulting in a dense, rich, and moist crumb. Regular cakes often rely on leavening agents like baking powder and baking soda to create a lighter, airier, and more open crumb. Pound cakes are known for their substantial texture, while regular cakes can range from light and fluffy to moist and tender.
Can I make this Chocolate Pound Cake ahead of time?
Absolutely! Pound cakes are excellent for making ahead. Their dense nature means they tend to stay moist longer than other cakes. You can bake this cake 2-3 days in advance and store it properly wrapped at room temperature. For longer periods, it freezes beautifully for up to 3 months. In fact, many bakers find that pound cake’s flavor and texture improve slightly after a day or two, as the flavors meld and the moisture distributes evenly.
Why did my pound cake crack on top?
Cracking on top is very common for pound cakes and is often a sign of a well-baked cake, not a flaw. It usually occurs because the outside of the cake cooks and sets faster than the inside. As the inside continues to rise, it pushes through the already set crust, causing it to crack. This is particularly noticeable in denser cakes like pound cakes. To minimize cracking, some bakers create a “butter boat” by piping a line of softened butter down the center of the batter before baking, which encourages a more controlled split.
My pound cake is dry, what went wrong?
A dry pound cake is typically the result of overbaking or not using room temperature ingredients. Overbaking causes too much moisture to evaporate from the cake, leading to a dry, crumbly texture. Ensure you’re testing for doneness accurately with a skewer or toothpick. Secondly, using cold butter or eggs can prevent proper emulsification of fats in the batter, leading to a less tender and moist final product. Always use room temperature ingredients for optimal results.