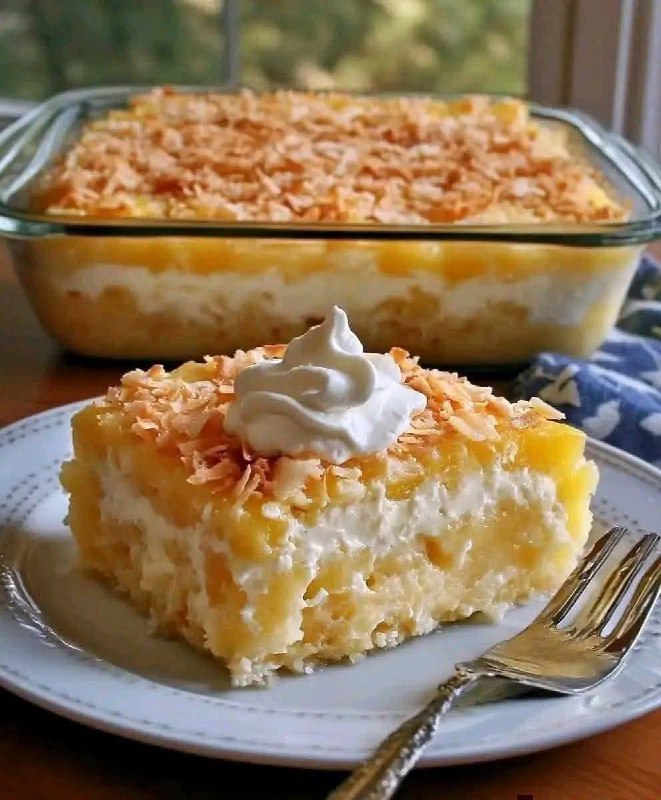
Introduction
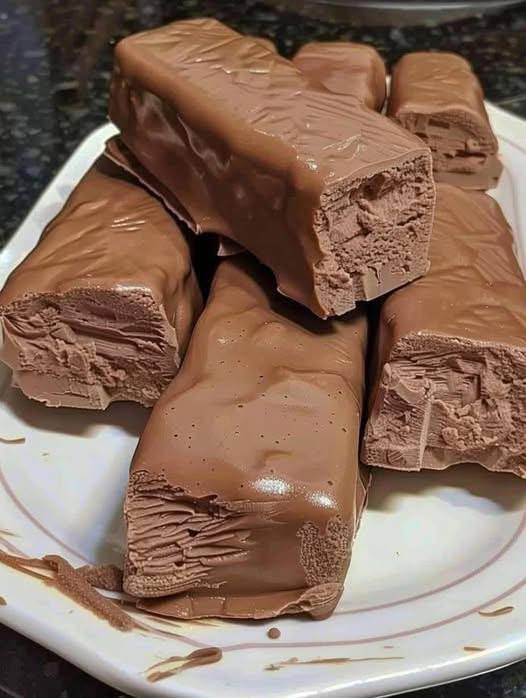
There are few treats that evoke such a pure sense of nostalgic joy as a classic chocolate covered ice cream bar. That satisfying crack of the chocolate shell, giving way to a smooth, creamy, and intensely cold ice cream core – it’s a symphony of textures and temperatures that has delighted generations. While store-bought versions are always a pleasant indulgence, there’s something truly magical about crafting these frozen masterpieces in your own kitchen. Imagine biting into a bar where you control every single ingredient, from the richness of the ice cream to the quality of the chocolate coating. The freshness, the personalized flavor combinations, and the sheer satisfaction of creating such an iconic dessert from scratch are unparalleled.
This recipe isn’t just about recreating a classic; it’s about elevating it. We’ll guide you through making homemade chocolate covered ice cream bars that boast the perfect balance of creamy and crunchy, sweet and rich. Forget the mystery ingredients and embrace the simple pleasure of real ice cream and high-quality chocolate. Whether you’re a seasoned dessert maker or just looking for a fun kitchen project, our straightforward approach ensures a delicious outcome every time. Get ready to impress your family and friends with a treat that tastes even better than your fondest childhood memories.
The beauty of making your own ice cream bars lies in the endless possibilities for customization. You can choose your favorite ice cream flavor, experiment with different types of chocolate for the coating, and even add a sprinkle of your preferred toppings. This guide will provide you with the foundational techniques for achieving that coveted “magic shell” effect – a chocolate coating that hardens instantly and delivers that satisfying snap with every bite. So, gather your ingredients, clear some space in your freezer, and prepare to embark on a delightful culinary adventure that culminates in the ultimate frozen dessert.
Nutritional Information
Per serving (approximate values):
- Calories: 320 kcal
- Protein: 4g
- Carbohydrates: 30g
- Fat: 22g
- Fiber: 2g
- Sodium: 65mg
Ingredients
- 1.5 quarts (about 6 cups) high-quality chocolate ice cream, slightly softened
- 12 ounces good quality milk chocolate (or semi-sweet, dark chocolate), chopped
- 3 tablespoons refined coconut oil (do not use virgin coconut oil as it will impart a coconut flavor)
- Optional: 1/2 cup chopped nuts, sprinkles, shredded coconut, or other toppings
- Optional: 6-8 wooden popsicle sticks
Instructions
- Prepare the Ice Cream Molds: Line a 9×5 inch loaf pan, or individual bar molds if you have them, with parchment paper, leaving an overhang on the sides. This will make it easier to lift the frozen ice cream out later.
- Press the Ice Cream: Scoop the slightly softened chocolate ice cream into the prepared loaf pan or molds. Use the back of a spoon or a spatula to press the ice cream down firmly and evenly, ensuring there are no air pockets. For individual molds, fill each cavity completely.
- Initial Freeze: Place the pan or molds in the freezer for at least 3-4 hours, or preferably overnight, until the ice cream is completely solid. This step is crucial for preventing the ice cream from melting too quickly during the dipping process.
- Cut and Prepare Bars (if using a loaf pan): Once the ice cream is rock solid, use the parchment paper overhang to lift the block of ice cream out of the loaf pan. Place it on a cutting board. Using a sharp, warm knife (run it under hot water and wipe dry), cut the ice cream block into 6-8 even bars. If desired, carefully insert a wooden popsicle stick into the center of each bar at this stage.
- Second Freeze: Arrange the cut ice cream bars (with or without sticks) on a parchment-lined baking sheet. Return them to the freezer for at least another hour, or until they are absolutely frozen solid again. This extra freeze is key to a successful chocolate coating.
- Prepare the Chocolate Coating: While the bars are freezing, prepare your chocolate coating. In a microwave-safe bowl, combine the chopped chocolate and refined coconut oil. Microwave in 30-second intervals, stirring well after each interval, until the chocolate is completely melted and smooth. Alternatively, you can melt the chocolate and coconut oil in a double boiler over simmering water, stirring until smooth. Allow the melted chocolate to cool slightly to room temperature, but ensure it remains fluid. If it’s too hot, it will melt your ice cream.
- Set up Dipping Station: Prepare a clean, parchment-lined baking sheet and place it close to your freezer. If using toppings, have them ready in a shallow dish.
- Dip the Ice Cream Bars: Working quickly, remove one frozen ice cream bar from the freezer. Hold it by the stick (if using) or with a fork. Submerge the entire bar into the melted chocolate coating, ensuring it’s fully covered. Lift the bar out, allowing any excess chocolate to drip off back into the bowl.
- Apply Toppings (Optional): If adding toppings, immediately sprinkle them onto the wet chocolate coating before it sets.
- Freeze to Set: Place the dipped bar onto the prepared parchment-lined baking sheet. Immediately return the dipped bar to the freezer. Repeat the dipping process with the remaining ice cream bars, working one at a time to keep the ice cream as cold as possible.
- Final Freeze: Once all bars are dipped and topped, return the baking sheet to the freezer for at least 30 minutes, or until the chocolate coating is completely firm and has a satisfying “snap.”
- Serve and Enjoy: Your homemade chocolate covered ice cream bars are ready to be enjoyed!
Cooking Tips and Variations
Achieving the Perfect Chocolate Shell: The secret to that iconic “snap” is the refined coconut oil. It thins the chocolate slightly and helps it harden instantly when it comes into contact with the cold ice cream. Ensure your melted chocolate is not too hot (warm to the touch, but not scalding) when dipping, or it will melt the ice cream core. If your chocolate starts to thicken as you dip, gently re-warm it for a few seconds in the microwave or over the double boiler.
Ice Cream Flavor Variations: While chocolate ice cream is a classic, don’t limit yourself! Try vanilla bean, mint chip, strawberry, coffee, or even a swirl ice cream for your core. For an extra decadent touch, use a premium, high-fat ice cream for the creamiest texture.
Chocolate Coating Options: Experiment with different types of chocolate for the coating. Dark chocolate offers a more intense, less sweet flavor, while white chocolate can be dyed with food coloring for fun variations. You can also mix in a teaspoon of peppermint extract or orange zest into the melted chocolate for flavored coatings.
Topping Ideas: Beyond the basics, consider crushed pretzels for a salty-sweet crunch, mini chocolate chips, flaky sea salt, or even a drizzle of contrasting colored melted chocolate for a decorative finish. For a truly gourmet touch, finely chop some toasted nuts like almonds or pistachios.
Troubleshooting Common Issues: If your chocolate isn’t setting, your ice cream likely wasn’t cold enough. Ensure it’s frozen solid before dipping. If the chocolate is too thick, add another teaspoon of coconut oil and re-melt. If the ice cream is melting too fast while dipping, try freezing the bars for an additional hour, and work even faster when dipping.
For a Thicker Shell: For a more substantial chocolate coating, you can dip the bars twice. After the first dip, immediately place the bar back in the freezer for 5-10 minutes to allow that layer to set, then dip it a second time. This will create an even thicker, more satisfying shell.
Storage and Reheating
These homemade chocolate covered ice cream bars are best enjoyed fresh, but they store beautifully in the freezer. To store, wrap each individual bar tightly in plastic wrap, then place them in an airtight freezer-safe container or a large freezer bag. This prevents freezer burn and helps maintain their texture and flavor. Stored properly, they will keep well in the freezer for up to 2-3 weeks. There is no reheating necessary for these frozen treats; simply remove them from the freezer a few minutes before serving to allow the ice cream to soften slightly, if desired, for a creamier bite.
Frequently Asked Questions
Can I use chocolate chips instead of chopped chocolate?
Yes, you can use chocolate chips, but be aware that chocolate chips often contain stabilizers that prevent them from melting as smoothly as high-quality chopped chocolate. You might need to stir more vigorously and ensure they are fully melted with the coconut oil to achieve a smooth, dippable consistency.
What if I don’t have coconut oil? Can I use another oil?
Refined coconut oil is highly recommended because it has a neutral flavor and a unique property of hardening quickly at cold temperatures, which is essential for the “magic shell” effect. While some neutral oils like vegetable oil or canola oil could work, they may not provide the same hard “snap” and quick setting time. Butter is not recommended as it contains water and can make the chocolate seize.
My chocolate coating is too thick/thin. How can I fix it?
If your chocolate coating is too thick, you can add another teaspoon or two of refined coconut oil and gently re-melt and stir until it reaches your desired consistency. If it’s too thin, unfortunately, it’s harder to thicken without adding more chocolate, which would require re-melting and potentially cooling the mixture again.
Can I make these without popsicle sticks?
Absolutely! The popsicle sticks are purely for convenience in handling. If you prefer, you can simply cut the ice cream into bars and dip them using a fork or by carefully holding the ends. Just be sure to work quickly to prevent the ice cream from melting too much.