Introduction
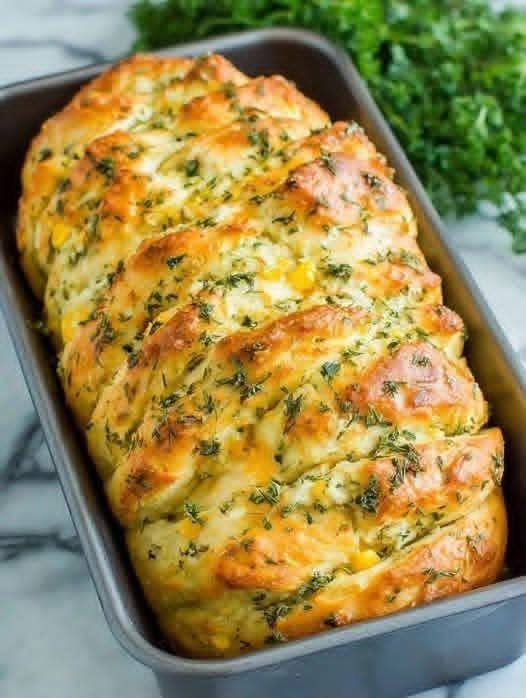
There are very few things in life as satisfying as the aroma of freshly baked bread wafting through your home. Now, imagine that aroma infused with the irresistible scent of melting cheese and fragrant herbs. Welcome to the world of Cheesy Herb Pull-Apart Bread – a culinary masterpiece that’s as delightful to look at as it is to devour. This isn’t just any bread; it’s an experience. Each golden-brown, buttery layer is packed with gooey, savory cheese and vibrant herbs, just begging to be pulled apart, piece by glorious piece. It’s interactive, it’s indulgent, and it’s utterly addictive.
What makes pull-apart bread so special? It’s the sheer joy of the act itself. Unlike a traditional loaf that requires slicing, this bread is designed for sharing, for communal feasting, for moments where everyone reaches in and claims their own cheesy, fluffy portion. It transforms a simple side dish into a fun, engaging centerpiece. Perfect for a cozy family dinner, a lively game night, or as a show-stopping appetizer at your next gathering, this Cheesy Herb Pull-Apart Bread is guaranteed to be a crowd-pleaser and disappear faster than you can say “more cheese, please!”
This recipe is a testament to simple ingredients coming together to create something truly extraordinary. With a soft, enriched dough as its canvas, we layer on a generous mixture of savory cheeses, fresh parsley, and a hint of garlic, creating a symphony of flavors and textures in every bite. It’s surprisingly easy to make, even for novice bakers, and the payoff is immense: a beautiful, fragrant loaf that’s crispy on the outside, tender on the inside, and bursting with cheesy, herby goodness. Get ready to impress your taste buds and your guests with this absolute must-try recipe.
Nutritional Information
Per serving (approximate values, based on 12 servings per loaf):
- Calories: 320 kcal
- Protein: 12g
- Carbohydrates: 35g
- Fat: 15g
- Fiber: 2g
- Sodium: 480mg
Ingredients
For the Dough:
- 1 cup (240ml) warm milk (105-115°F / 40-46°C)
- 2 ¼ teaspoons (1 standard packet) active dry yeast
- 1 tablespoon granulated sugar
- 3 cups (360g) all-purpose flour, plus more for dusting
- 1 teaspoon salt
- ¼ cup (56g) unsalted butter, melted and cooled, plus 2 tablespoons for brushing
- 1 large egg, at room temperature
For the Cheesy Herb Filling:
- ½ cup (113g) unsalted butter, melted
- 3 cloves garlic, minced (about 1 tablespoon)
- ½ cup (12g) fresh parsley, finely chopped
- ¼ cup (6g) fresh chives, finely chopped (optional, but recommended)
- 1 teaspoon dried oregano (or 1 tablespoon fresh, chopped)
- ½ teaspoon black pepper
- ¼ teaspoon red pepper flakes (optional, for a little kick)
- 1 ½ cups (170g) shredded sharp cheddar cheese
- 1 ½ cups (170g) shredded mozzarella cheese (low-moisture, part-skim)
- ¼ cup (30g) grated Parmesan cheese
- ½ cup (75g) frozen corn kernels, thawed and patted dry (optional, adds a nice sweetness and texture)
Instructions
- Activate the Yeast: In a large bowl or the bowl of a stand mixer, combine the warm milk, granulated sugar, and active dry yeast. Stir gently and let it sit for 5-10 minutes until foamy. This indicates the yeast is active.
- Prepare the Dough: To the yeast mixture, add the 3 cups of all-purpose flour, 1 teaspoon of salt, ¼ cup of melted and cooled butter, and the large egg. If using a stand mixer, attach the dough hook. Mix on low speed until a shaggy dough forms, then increase speed to medium-low and knead for 8-10 minutes until the dough is smooth, elastic, and pulls away from the sides of the bowl. If kneading by hand, turn the dough out onto a lightly floured surface and knead for 10-12 minutes until smooth and elastic.
- First Rise: Lightly grease a clean bowl with a little oil. Place the dough in the bowl, turning it once to coat. Cover the bowl with plastic wrap or a clean kitchen towel and let it rise in a warm, draft-free place for 1-1.5 hours, or until doubled in size.
- Prepare the Cheesy Herb Filling: While the dough is rising, prepare the filling. In a medium bowl, combine the ½ cup of melted butter, minced garlic, finely chopped parsley, chives (if using), dried oregano, black pepper, and red pepper flakes (if using). Stir well to combine. In a separate bowl, combine the shredded cheddar, mozzarella, Parmesan cheeses, and the thawed corn kernels (if using). Toss gently to mix.
- Punch Down and Roll Out: Once the dough has doubled, gently punch it down to release the air. Turn the dough out onto a lightly floured surface. Using a rolling pin, roll the dough into a large rectangle, approximately 12×18 inches (30×45 cm) and about ¼ inch thick.
- Assemble the Pull-Apart Layers: Evenly spread about two-thirds of the melted herb butter mixture over the entire surface of the rolled-out dough, leaving a small ½-inch border along one of the longer edges. Then, evenly sprinkle the entire cheese and corn mixture over the buttered dough, pressing lightly to adhere.
- Cut and Stack the Dough: Using a sharp knife or a pizza cutter, cut the dough lengthwise into 6 equal strips, each approximately 2 inches wide. Carefully stack these strips on top of each other. You should now have one tall, layered stack of dough.
- Slice and Arrange in Loaf Pan: Cut the stacked dough crosswise into 6-8 equal squares (approximately 2-3 inches wide each). You will have 6-8 stacks of layered dough squares. Lightly grease a 9×5 inch (23×13 cm) loaf pan. Arrange the stacked dough squares vertically in the prepared loaf pan, standing them on their sides so the layers are visible. Try to fit them snugly, but don’t compress them too much.
- Second Rise: Cover the loaf pan loosely with plastic wrap or a clean kitchen towel. Let the bread rise in a warm, draft-free place for another 30-45 minutes, or until noticeably puffy and almost doubled in size again. Preheat your oven to 375°F (190°C) during the last 15 minutes of the second rise.
- Bake the Bread: Place the loaf pan in the preheated oven. Bake for 30-35 minutes, or until the top is golden brown and the cheese is bubbly. If the top starts to brown too quickly, you can loosely tent it with aluminum foil for the last 10-15 minutes of baking. An internal temperature of 200-210°F (93-99°C) indicates it’s fully cooked.
- Finish and Serve: While the bread is still hot from the oven, melt the remaining 2 tablespoons of butter. Brush the melted butter over the top of the baked bread for extra shine and flavor. Let the bread cool in the loaf pan for 10-15 minutes before carefully removing it to a wire rack. This allows the cheese to set slightly, making it easier to pull apart without everything falling out. Serve warm and enjoy pulling apart the delicious, cheesy, herby layers!
Cooking Tips and Variations
Achieving the perfect Cheesy Herb Pull-Apart Bread is all about attention to detail and a little creativity. Here are some tips to ensure your loaf turns out beautifully every time, along with ideas for customizing it to your taste.
Tips for Success:
- Dough Consistency is Key: A slightly sticky, soft dough is what you’re aiming for. If your dough is too stiff, it will be dry and tough. If it’s too wet, it will be difficult to handle. Add flour one tablespoon at a time if it’s too sticky, or a teaspoon of water at a time if it’s too dry during kneading. The dough should be smooth and elastic after kneading.
- Warm Milk, Not Hot: Ensure your milk is warm (105-115°F / 40-46°C), not hot. Milk that’s too hot will kill the yeast, preventing your bread from rising. If you don’t have a thermometer, it should feel comfortably warm to the touch, like a baby’s bathwater.
- Fresh Herbs Make a Difference: While dried herbs can be used in a pinch, fresh parsley and chives provide a much more vibrant flavor and beautiful color. Don’t skimp on them!
- Quality Cheese Matters: Use good quality, meltable cheeses. Shredding cheese from a block yourself is always recommended over pre-shredded varieties, as they often contain anti-caking agents that can affect melt and texture. A blend of cheeses adds complexity.
- Don’t Overbake: Bake until the top is golden brown and the cheese is bubbly, but avoid overbaking, which can lead to a dry loaf. If the top is browning too quickly, tent it with foil.
- Cool Before Serving: While it’s tempting to dive in immediately, letting the bread cool in the pan for 10-15 minutes allows the melted cheese to set slightly. This prevents all the gooey goodness from oozing out and makes it easier to pull apart individual pieces cleanly.
- Grease Your Loaf Pan Well: Ensure your loaf pan is adequately greased to prevent sticking, especially with all that melted cheese.
- Warm Place for Rising: A warm, draft-free environment is crucial for yeast activation and rising. If your kitchen is cool, you can preheat your oven to its lowest setting for a few minutes, then turn it off and place the covered dough inside (with the door ajar) for rising.
Variations and Customizations:
- Garlic Lover’s Dream: For an extra garlic punch, you can add 1 teaspoon of garlic powder to the dough ingredients or increase the fresh minced garlic in the filling to 4-5 cloves.
- Herb Garden Medley: Experiment with different fresh herbs! Rosemary, thyme, dill, or a mix of Italian herbs would all be delicious. Adjust quantities to your preference.
- Spice It Up: Increase the red pepper flakes for a spicier kick, or add a pinch of cayenne pepper to the herb butter mixture.
- Smoky Bacon Addition: Cook and crumble 4-6 slices of bacon and mix them into the cheese and herb filling for a smoky, savory treat.
- Sun-Dried Tomato Delight: Chop up a ¼ cup of oil-packed sun-dried tomatoes (drained well) and add them to the cheese mixture for a burst of tangy, umami flavor.
- Different Cheese Combinations: Explore other cheese blends! Provolone, Monterey Jack, Gruyere, or even a smoked gouda would work wonderfully. Just ensure they are good melting cheeses.
- Onion or Shallot: Finely minced shallots or green onions can be added to the herb mixture for an extra layer of savory flavor.
- Everything Bagel Seasoning: Sprinkle some everything bagel seasoning on top of the loaf just before baking for an extra savory crunch and flavor boost.
- Make it Sweet (Dessert Version): While this recipe is savory, the pull-apart concept can be adapted for sweet treats! Imagine cinnamon sugar and cream cheese frosting, or chocolate and hazelnut spread.
Storage and Reheating
While this Cheesy Herb Pull-Apart Bread is undoubtedly best enjoyed fresh and warm from the oven, you can certainly store and reheat leftovers. Here’s how to keep it delicious:
Storage:
- Room Temperature: If you plan to eat the bread within 1-2 days, you can store it at room temperature. Once completely cooled, wrap the entire loaf tightly in aluminum foil or plastic wrap, or place it in an airtight container. This will help prevent it from drying out.
- Refrigerator: For longer storage, up to 3-4 days, wrap the bread tightly in plastic wrap and then in aluminum foil, or place it in an airtight container, and store it in the refrigerator. The cheese will firm up when cold.
- Freezer: This bread freezes surprisingly well! Once completely cooled, wrap the entire loaf (or individual slices/chunks) very tightly in plastic wrap, and then in a layer of aluminum foil. Place it in a freezer-safe bag. It can be stored in the freezer for up to 2-3 months. Thaw overnight in the refrigerator before reheating.
Reheating:
- Oven (Recommended): Reheating in the oven is the best way to revive that crispy crust and gooey cheese.
- Preheat your oven to 350°F (175°C).
- If refrigerated or frozen (and thawed), wrap the loaf loosely in aluminum foil to prevent it from drying out.
- Bake for 15-20 minutes for a refrigerated loaf, or 25-30 minutes for a frozen (thawed) loaf, or until heated through and the cheese is melted and bubbly again.
- For a crispier crust, remove the foil for the last 5 minutes of reheating.
- Microwave (Quick Option): The microwave is good for a quick reheat of individual portions, but it won’t give you the same crispy texture as the oven.
- Place a single portion on a microwave-safe plate.
- Heat on high for 20-30 seconds, or until warmed through and the cheese is soft. Be careful not to overheat, as it can make the bread tough.
- Air Fryer: An air fryer can also work well for individual pieces, providing a nice crisp.
- Preheat air fryer to 325°F (160°C).
- Place individual pieces in the air fryer basket in a single layer.
- Cook for 3-5 minutes, checking frequently, until warmed through and crispy.
No matter how you reheat it, serving the bread warm will always provide the best experience for pulling apart those delicious, cheesy layers!
Frequently Asked Questions
Can I make the dough ahead of time?
Absolutely! You can prepare the dough up to 24 hours in advance. After the first rise, punch down the dough, place it in a lightly oiled bowl, cover tightly with plastic wrap, and refrigerate. When you’re ready to bake, remove the dough from the refrigerator and let it come to room temperature for about 30-60 minutes before rolling it out and proceeding with the assembly instructions. This slow, cold rise can actually enhance the flavor of the bread.
What if my bread doesn’t rise?
There are a few common reasons why bread might not rise. The most likely culprits are inactive yeast (either expired, or killed by too hot liquid) or a cold environment. Ensure your yeast is fresh and your milk is warm (105-115°F / 40-46°C). Also, place the dough in a warm, draft-free spot for its rises. If your kitchen is cold, try placing the covered dough in a turned-off oven with the light on, or near a warm appliance. If after 30 minutes there’s no noticeable activity, your yeast might be dead, and it’s best to start over.
Can I use gluten-free flour for this recipe?
While you can attempt to use gluten-free all-purpose flour blends, yeast breads, especially those requiring elasticity and structure like pull-apart bread, can be challenging with gluten-free alternatives. Gluten-free flours behave differently and may require additional binders (like xanthan gum, which is often included in GF blends) and adjustments to liquid content. If you’re experienced with gluten-free baking, you might be able to adapt it, but for best results and a true pull-apart texture, we recommend using traditional all-purpose flour for this specific recipe.
How do I prevent the cheese from oozing out too much during baking?
A little cheese oozing is normal and part of the charm of cheesy bread! To minimize excessive leakage, ensure your dough strips are stacked snugly in the loaf pan. Also, make sure your cheese is shredded rather than cubed, as shredded cheese melts more evenly and holds its structure better within the layers. Cooling the bread for 10-15 minutes in the pan after baking also allows the cheese to set slightly, making for cleaner pulls.