I Don’t Buy Bread Anymore! No Kneading, No Eggs, No Butter – The Easiest and Cheapest Bread Recipe
If you’ve ever dreamed of making your own homemade bread but thought it was too complicated, this no-knead, no-egg, no-butter bread recipe will completely change your mind. It’s simple, budget-friendly, and requires minimal ingredients—perfect for beginners or anyone who wants fresh, warm bread without the hassle. You don’t need special equipment or baking skills to pull it off. In fact, once you try this recipe, you may never go back to store-bought bread again.
This easy bread has a golden crust, a soft and airy interior, and a naturally comforting flavor. The best part? You only need basic pantry staples and a few minutes of your time. No kneading, no eggs, and no butter—just mix, rest, and bake! Whether you enjoy it for breakfast with jam, use it for sandwiches, or serve it alongside soups and stews, this bread always delivers warm, homemade satisfaction.
Why You’ll Love This No-Knead Bread Recipe
This bread recipe is perfect for anyone who wants to save money and eat healthier by avoiding additives and preservatives found in store-bought loaves. It’s incredibly easy to make with simple ingredients, yet it tastes like it came from an artisan bakery. The no-knead method allows the dough to rest and rise naturally, developing flavor and texture without the effort of traditional kneading. It’s foolproof, reliable, and adaptable—once you master it, you can make it again and again with endless variations.
Ingredients You’ll Need
- 3 cups (360 g) all-purpose flour (or bread flour)
- 1 ¼ teaspoons salt
- ½ teaspoon instant yeast (or active dry yeast)
- 1 ½ cups (360 ml) warm water (not hot)
That’s it! Just four simple ingredients to create the easiest, most delicious loaf of bread you’ll ever make.
Step-by-Step Instructions
Step 1: Mix the Dry Ingredients
In a large bowl, combine the flour, salt, and yeast. Stir with a spoon or whisk to evenly distribute the ingredients. Make sure your yeast is fresh and active for the best rise.
Step 2: Add the Water
Pour in the warm water and stir until everything comes together. The dough will look sticky and shaggy, but that’s exactly what you want. There’s no need to knead—it just needs to be well mixed.
Step 3: Cover and Let It Rest
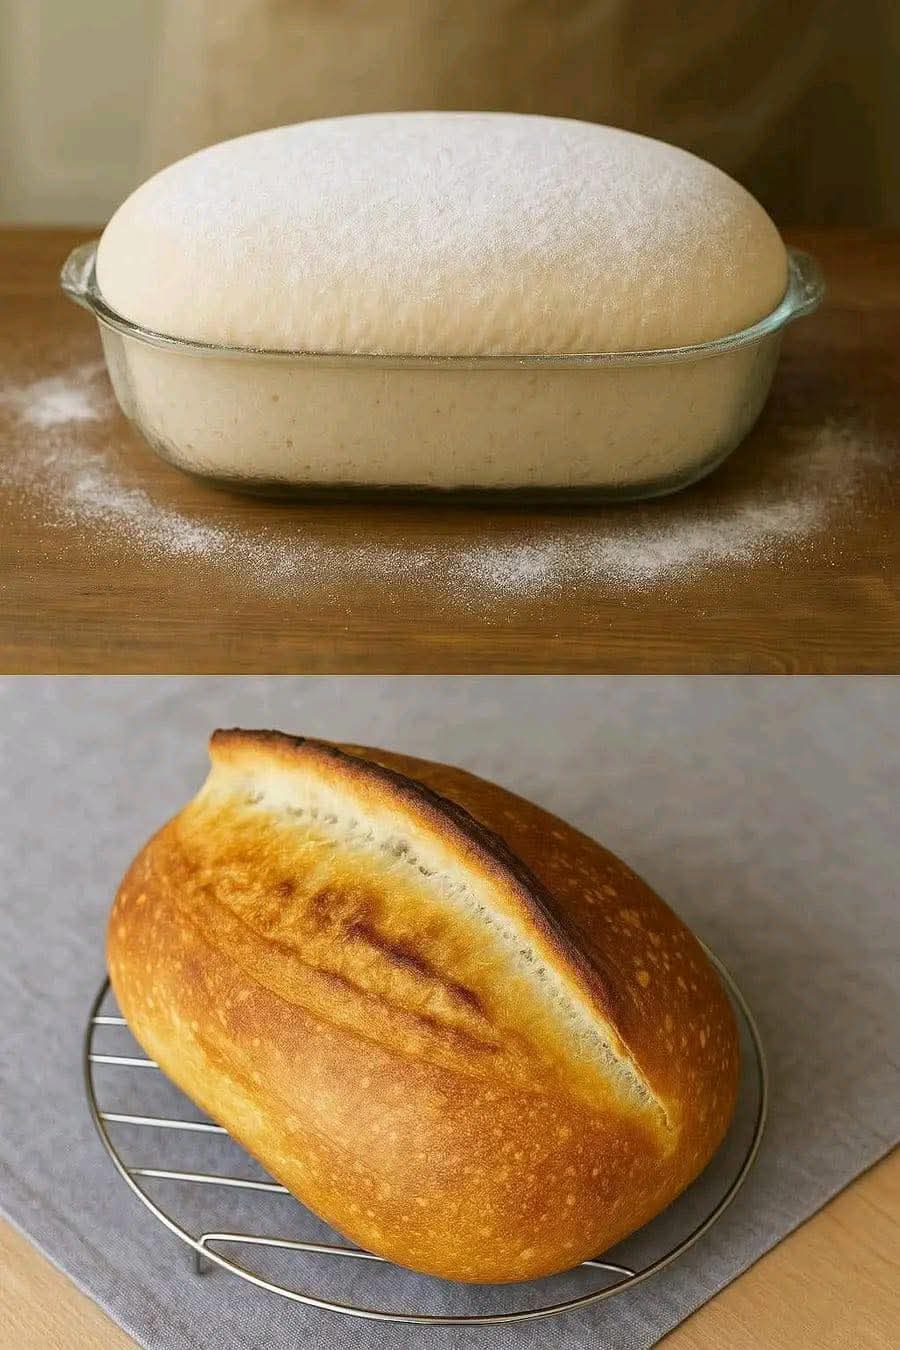
Cover the bowl with plastic wrap or a clean kitchen towel. Let the dough rest at room temperature for 10–12 hours (or overnight). During this time, the yeast will slowly ferment the dough, developing flavor and elasticity naturally. You’ll notice the dough will rise, double in size, and form small bubbles on the surface.
Step 4: Shape the Dough
Once the dough has rested, dust your countertop with a bit of flour and gently turn the dough out onto it. Use floured hands or a spatula to shape it into a round or oval loaf. Don’t knead—just fold the edges in and form it loosely.
Step 5: Second Rise
Place the shaped dough on parchment paper and cover it lightly with a towel. Let it rest for about 30–40 minutes while you preheat the oven. This step allows the dough to puff up again for a better rise during baking.
Step 6: Preheat the Oven and Baking Dish
Place a Dutch oven or heavy oven-safe pot (with lid) inside your oven and preheat to 450°F (230°C). Let the pot heat for at least 30 minutes before baking. This helps create steam inside, giving your bread that perfect crispy crust.
Step 7: Bake the Bread
Carefully remove the hot pot from the oven. Lift the dough using the parchment paper and place it inside the pot. Cover with the lid and bake for 30 minutes. Then remove the lid and bake for another 10–15 minutes until golden brown.
Step 8: Cool and Enjoy
Remove the bread from the pot and let it cool on a wire rack for at least 15–20 minutes before slicing. This allows the crumb to set and the flavors to develop fully. Slice, serve, and enjoy your fresh, homemade bread!
Tips for Success
- Use warm (not hot) water: Water that’s too hot can kill the yeast. Aim for about 100–110°F (38–43°C).
- Let it rise fully: Don’t rush the fermentation process. The longer the dough rests, the better the texture and flavor.
- Use a Dutch oven: This creates steam and helps form a beautiful golden crust. If you don’t have one, place an oven-safe dish of water in the bottom of your oven for similar results.
- Flour type matters: All-purpose flour gives a soft crumb, while bread flour makes it chewier. You can even mix in a bit of whole wheat flour for extra flavor.
- Storage: Store leftovers in a paper bag or wrap in a clean towel to keep the crust crisp. Avoid plastic bags—they make the crust soft.
Variations to Try
- Garlic & Herb Bread: Mix in dried herbs like oregano, rosemary, or thyme and add a teaspoon of garlic powder for extra aroma.
- Seeded Bread: Sprinkle sesame, poppy, or sunflower seeds on top before baking for added crunch.
- Whole Wheat Version: Replace up to half the white flour with whole wheat flour for a more wholesome flavor.
- Cheesy Bread: Add a handful of shredded cheese to the dough for a cheesy twist.
- Sweet Breakfast Bread: Add a spoonful of honey or sugar and some raisins for a slightly sweet loaf perfect for breakfast.
Why This Recipe Works
The no-knead method works because it relies on time rather than physical kneading to develop gluten. The long resting period allows the flour to hydrate and the yeast to slowly ferment, which builds structure and flavor naturally. This method is not only easy but also results in bread with a rustic texture and an artisan-style crust. It’s simple chemistry—flour, yeast, water, and salt come together to create magic.
Nutritional Benefits of Homemade Bread
Homemade bread made without eggs or butter is lighter and lower in fat than many store-bought varieties. You control the ingredients, avoiding unnecessary preservatives, sugar, or oils. With just flour, yeast, salt, and water, this bread is as clean and natural as it gets. It’s perfect for anyone seeking a simple, wholesome way to enjoy fresh bread every day.
How to Serve Your Homemade Bread
This bread is extremely versatile. You can serve it warm with olive oil or butter, slice it for sandwiches, or toast it for breakfast. It’s also excellent for soups and stews, soaking up flavors beautifully. For a Mediterranean touch, pair it with hummus, olives, or feta cheese. For breakfast, spread it with jam or honey for a naturally delicious treat.
Frequently Asked Questions
Can I use whole wheat flour instead of white flour?
Yes, but whole wheat flour absorbs more water, so you may need to add 2–3 tablespoons of extra water to the dough.
Do I need a Dutch oven?
No, but it helps. If you don’t have one, bake your bread on a baking sheet and place a pan of water on the lower rack to create steam.
Can I make the dough in advance?
Yes! After mixing, refrigerate the dough for up to 24 hours before baking. Let it sit at room temperature for about an hour before shaping and baking.
How do I know when the bread is done?
Tap the bottom of the loaf—it should sound hollow. You can also check with a thermometer; the internal temperature should be around 200°F (93°C).
Can I double the recipe?
Definitely. Just make sure your pot or baking dish is large enough, or divide the dough into two loaves.
Conclusion
Once you try this no-knead, no-egg, no-butter bread recipe, you’ll understand why so many home bakers swear by it. It’s incredibly easy, budget-friendly, and produces bakery-quality bread with minimal effort. Every slice is soft inside, crispy outside, and full of flavor—all from just four simple ingredients. So skip the store-bought loaves and treat yourself to the joy of homemade bread. You’ll save money, eat better, and experience the pure satisfaction of baking your own fresh loaf right from your kitchen.