
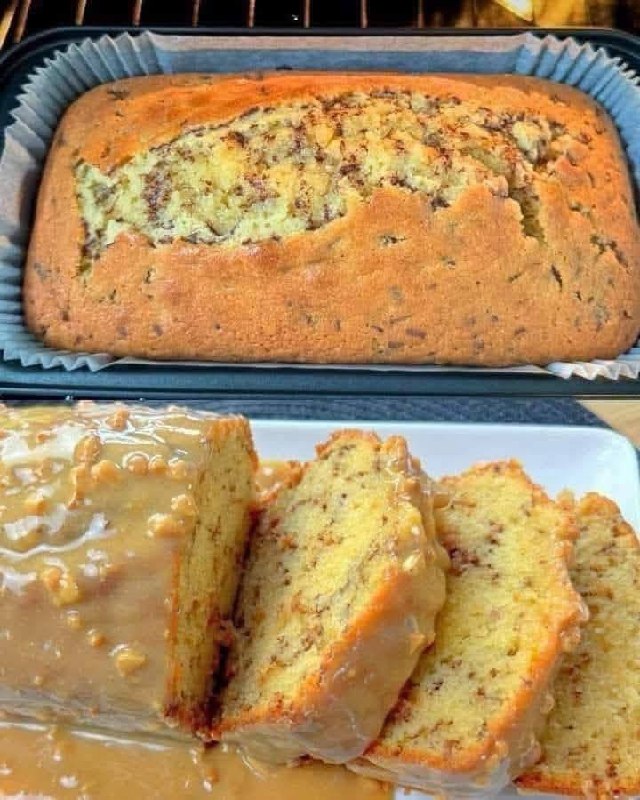
Marble Loaf Cake
Introduction
There’s something undeniably captivating about a Marble Loaf Cake. It’s a true classic that marries visual appeal with comforting flavors, making it a beloved treat for all ages. Imagine slicing into a tender, moist cake to reveal a swirling masterpiece of light and dark batter, a beautiful dance of vanilla and chocolate that promises a delightful bite every time. This particular recipe elevates the traditional marble cake, focusing on a perfectly balanced crumb, rich flavor, and that iconic, mesmerizing marble effect that makes it as much a feast for the eyes as it is for the palate.
What makes this Marble Loaf Cake truly special is its versatility and the sheer joy it brings. It’s sophisticated enough for a special occasion yet simple enough for an everyday indulgence. We’ve crafted this recipe to be incredibly approachable, ensuring that even novice bakers can achieve stunning results. From the secret to a perfectly moist crumb to the art of creating distinct, elegant swirls, we’ll guide you through every step. Prepare to impress your family and friends with a cake that looks like it came from a professional bakery, but with all the warmth and love of a homemade creation.
The beauty of the marble effect lies in its simplicity and the striking contrast it creates. Each slice is unique, a little piece of edible art that’s both playful and elegant. This loaf cake format makes it ideal for sharing, easy to slice, and perfect for carrying to picnics, potlucks, or simply enjoying with a cup of coffee or tea. Get ready to bake a cake that will become a cherished staple in your recipe collection – a true testament to the timeless appeal of the Marble Loaf Cake.
Nutritional Information
Per serving (approximate values):
- Calories: 320
- Protein: 4g
- Carbohydrates: 45g
- Fat: 15g
- Fiber: 1g
- Sodium: 200mg
Ingredients
- For the Cake:
- 1 ½ cups (180g) all-purpose flour, sifted
- 1 teaspoon baking powder
- ½ teaspoon baking soda
- ¼ teaspoon salt
- ½ cup (113g) unsalted butter, softened
- 1 cup (200g) granulated sugar
- 2 large eggs, at room temperature
- 1 teaspoon pure vanilla extract
- ½ cup (120ml) buttermilk, at room temperature
- 2 tablespoons unsweetened cocoa powder
- 2 tablespoons hot water
- For the Glaze (Optional):
- 1 cup (120g) powdered sugar, sifted
- 2 tablespoons milk (or cream)
- ½ teaspoon pure vanilla extract
Instructions
- Prepare Your Pan: Preheat your oven to 350°F (175°C). Grease and flour a 9×5 inch loaf pan, or line it with parchment paper, leaving an overhang on the long sides for easy removal.
- Combine Dry Ingredients: In a medium bowl, whisk together the sifted all-purpose flour, baking powder, baking soda, and salt. Set aside.
- Cream Butter and Sugar: In a large bowl, using an electric mixer, cream together the softened unsalted butter and granulated sugar on medium speed until light and fluffy, about 3-4 minutes.
- Add Eggs and Vanilla: Beat in the large eggs one at a time, mixing well after each addition. Scrape down the sides of the bowl as needed. Stir in the pure vanilla extract.
- Alternate Wet and Dry: With the mixer on low speed, gradually add about one-third of the dry ingredient mixture to the wet ingredients, mixing until just combined. Pour in half of the buttermilk and mix until just incorporated. Repeat with another third of the dry ingredients, then the remaining buttermilk, and finally the last third of the dry ingredients. Mix until just combined, being careful not to overmix.
- Prepare Chocolate Batter: In a small bowl, whisk together the unsweetened cocoa powder and hot water until smooth and thick.
- Divide Batter: Divide the plain cake batter into two equal portions. To one portion, add the prepared chocolate mixture and stir gently until fully combined.
- Create the Marble Effect: Spoon alternating dollops of vanilla and chocolate batter into the prepared loaf pan.
- Swirl the Batter: Using a knife or skewer, gently swirl through the batters once or twice to create the marble pattern. Be careful not to overmix, or the colors will blend too much.
- Bake: Place the loaf pan in the preheated oven and bake for 50-60 minutes, or until a wooden skewer or toothpick inserted into the center of the cake comes out clean or with a few moist crumbs attached.
- Cool: Let the cake cool in the loaf pan on a wire rack for 10-15 minutes. Then, carefully lift the cake out of the pan using the parchment paper overhang and transfer it directly to the wire rack to cool completely before glazing.
- Prepare the Glaze (Optional): While the cake cools, whisk together the sifted powdered sugar, milk, and vanilla extract in a small bowl until smooth. If the glaze is too thick, add a touch more milk; if too thin, add a bit more powdered sugar.
- Glaze and Serve: Once the cake is completely cool, drizzle the glaze evenly over the top. Let the glaze set for about 15-20 minutes before slicing and serving.
Cooking Tips and Variations
Preventing a Dry Cake: The key to a moist marble loaf cake lies in not overmixing the batter once the flour is added. Overmixing develops the gluten, leading to a tough, dry cake. Mix just until the ingredients are combined. Also, ensure your butter, eggs, and buttermilk are at room temperature; this allows them to emulsify better, creating a smoother, more uniform batter that holds moisture effectively.
Achieving the Best Marbling Effect: Don’t overdo the swirling! After dropping alternating spoonfuls of batter, use a knife or skewer to make just one or two gentle S-shaped swirls through the batter. Too much swirling will cause the colors to blend completely, losing the distinct marble pattern. Aim for a subtle, elegant swirl, not a vigorous mix.
How to Test for Doneness: The toothpick test is your best friend. Insert a wooden skewer or toothpick into the very center of the loaf cake. If it comes out clean or with only a few moist crumbs attached, your cake is done. If it comes out with wet batter, continue baking for another 5-10 minutes and test again. Avoid opening the oven door too frequently during baking, especially in the first 30 minutes, as this can cause the cake to sink.
Cooling Instructions: Patience is a virtue when cooling. Allow the cake to cool in the pan for 10-15 minutes before attempting to remove it. This allows the cake to firm up slightly, preventing it from breaking. Then, transfer it to a wire rack to cool completely. Slicing a warm cake can result in a gummy texture and make it difficult to get clean slices.
Flavor Variations: Don’t be afraid to experiment! For an almond marble cake, add ½ teaspoon almond extract to the vanilla batter. You could also add a teaspoon of instant espresso powder to the chocolate batter for a mocha marble effect. Citrus zest (lemon or orange) can be added to the vanilla batter for a bright, refreshing twist. For a slightly richer flavor, swap out some of the buttermilk for sour cream or plain full-fat yogurt.
Pan Prep Perfection: For easy release and cleanup, always grease and flour your loaf pan thoroughly. Alternatively, lining the pan with parchment paper, leaving an overhang on the long sides, is an excellent method. The overhang acts as handles, making it effortless to lift the cooled cake out of the pan.
Glaze Tips: For a shiny, smooth glaze, ensure your powdered sugar is sifted to remove any lumps. Adjust the consistency with milk or cream until it’s pourable but not too thin. If you want a thicker, more opaque glaze, use less liquid. Apply the glaze once the cake is completely cool; applying it to a warm cake will cause it to melt and run off.
Chocolate Choice: For the best chocolate flavor, use good quality unsweetened cocoa powder. Dutch-processed cocoa powder will give a darker color and a milder chocolate flavor, while natural cocoa powder will yield a lighter color and a more intense, slightly acidic chocolate taste.
Adding Texture: For a delightful crunch, consider sprinkling some chopped nuts (like walnuts or pecans) over the top of the cake before baking, or incorporate them into the batter if you prefer. You could also sprinkle mini chocolate chips into the chocolate batter for extra pockets of melty goodness.
Storage and Reheating
Storage: This Marble Loaf Cake is best stored at room temperature in an airtight container. It will stay fresh and moist for 3-4 days. If your kitchen is particularly warm, or if you’ve used a glaze that contains dairy, you might consider storing it in the refrigerator. However, chilling can sometimes alter the texture of the cake, making it slightly denser, so room temperature is generally preferred for optimal taste and texture.
Reheating: While this loaf cake is delicious at room temperature, sometimes a slightly warmed slice can be extra comforting, especially if it’s been refrigerated. To gently warm a slice, you can place it in the microwave for 10-15 seconds until just warm, not hot. Alternatively, you can place a slice in a toaster oven or conventional oven preheated to 300°F (150°C) for about 5-7 minutes. Be careful not to overheat, as this can dry out the cake.
Freezing: Marble Loaf Cake freezes exceptionally well. To freeze, ensure the cake is completely cooled. You can freeze it whole, half, or in individual slices. Wrap the cake tightly in plastic wrap, then an additional layer of aluminum foil. This double layer helps prevent freezer burn. Label with the date. It can be stored in the freezer for up to 2-3 months. To thaw, simply unwrap the cake (or slices) and let it come to room temperature on the counter for several hours or overnight. If desired, you can gently warm it as described above after thawing.
Frequently Asked Questions
What kind of chocolate should I use for the marble effect?
For the best marble effect, we recommend using unsweetened cocoa powder mixed with hot water to create a thick paste. This method provides a rich chocolate flavor and color without adding extra fat or liquid that could alter the cake’s texture. You can use either natural or Dutch-processed cocoa powder, depending on your preference for color and flavor intensity.
Can I make this cake without buttermilk?
Yes, you can! If you don’t have buttermilk on hand, you can easily make a substitute. Simply pour ½ cup of regular milk (dairy or non-dairy) into a liquid measuring cup, then add 1 tablespoon of lemon juice or white vinegar. Stir it gently and let it sit for 5-10 minutes until it slightly curdles. This homemade buttermilk substitute will provide the necessary acidity and moisture for the cake.
Why did my marble pattern disappear or blend too much?
This usually happens due to over-swirling the batter. The key to a distinct marble pattern is minimal intervention. After spooning alternating dollops of vanilla and chocolate batter, use a knife or skewer to make just one or two gentle S-shaped swirls through the batter. Resist the urge to mix it vigorously, as this will cause the colors to combine and lose their definition. Less is definitely more when it comes to marbling!


