
Introduction
Get ready to elevate your side dish game with this incredibly delicious Creamy Garlic Butter Corn on the Cob! Imagine sweet, tender corn kernels swimming in a rich, velvety sauce infused with aromatic garlic and herbaceous notes. This isn’t just corn; it’s an experience – a savory, decadent treat that’s surprisingly simple to make yet delivers maximum flavor. It’s the kind of dish that disappears from the table in minutes, leaving everyone wanting more.
What makes this recipe so special is the magical combination of fresh corn’s natural sweetness with the luxurious depth of garlic butter. The creamy texture, achieved by simmering the corn directly in the butter sauce, ensures every bite is coated in pure deliciousness. Whether you’re hosting a backyard BBQ, looking for a quick weeknight side, or adding a touch of gourmet to your holiday spread, this Creamy Garlic Butter Corn on the Cob is a guaranteed crowd-pleaser that will have everyone asking for the recipe.
Prepare to fall in love with this versatile and undeniably appealing dish. It’s a testament to how a few simple ingredients, thoughtfully prepared, can create something truly extraordinary. The vibrant colors, the intoxicating aroma, and the irresistible taste all come together to make this corn on the cob a star on any plate. Let’s dive in and transform ordinary corn into an unforgettable culinary delight!
Nutritional Information
Per serving (approximate values):
- Calories: 350
- Protein: 6g
- Carbohydrates: 35g
- Fat: 25g
- Fiber: 4g
- Sodium: 320mg
Ingredients
- 4 ears fresh corn on the cob, shucked and cut into 2-3 inch pieces
- 1/2 cup (1 stick) unsalted butter
- 4 cloves garlic, minced
- 1/2 teaspoon dried parsley
- 1/4 teaspoon dried chives
- 1/4 teaspoon smoked paprika
- 1/4 teaspoon onion powder
- 1/4 teaspoon black pepper
- 1/2 teaspoon salt, or to taste
- Optional: Fresh chopped parsley or chives for garnish
- Optional: Pinch of red pepper flakes for heat
- Optional: 1 tablespoon fresh lemon juice
Instructions
- Prepare the Corn: Begin by shucking the fresh corn, removing all husks and silk. For easier handling and serving, use a sharp chef’s knife to carefully cut each ear of corn into 2-3 inch segments. You should get about 3-4 pieces per ear. Set aside.
- Melt the Butter: In a large, deep skillet or frying pan with high sides, melt the unsalted butter over medium heat. Ensure the butter is fully melted and slightly shimmering, but do not let it brown.
- Sauté the Garlic: Once the butter is melted, add the minced garlic to the pan. Sauté for about 30-60 seconds, stirring constantly, until the garlic becomes fragrant. Be careful not to burn the garlic, as burnt garlic can taste bitter.
- Add Dried Seasonings: Stir in the dried parsley, dried chives, smoked paprika, onion powder, black pepper, and salt into the melted garlic butter. Mix well to combine all the spices and herbs with the butter, allowing their aromas to release.
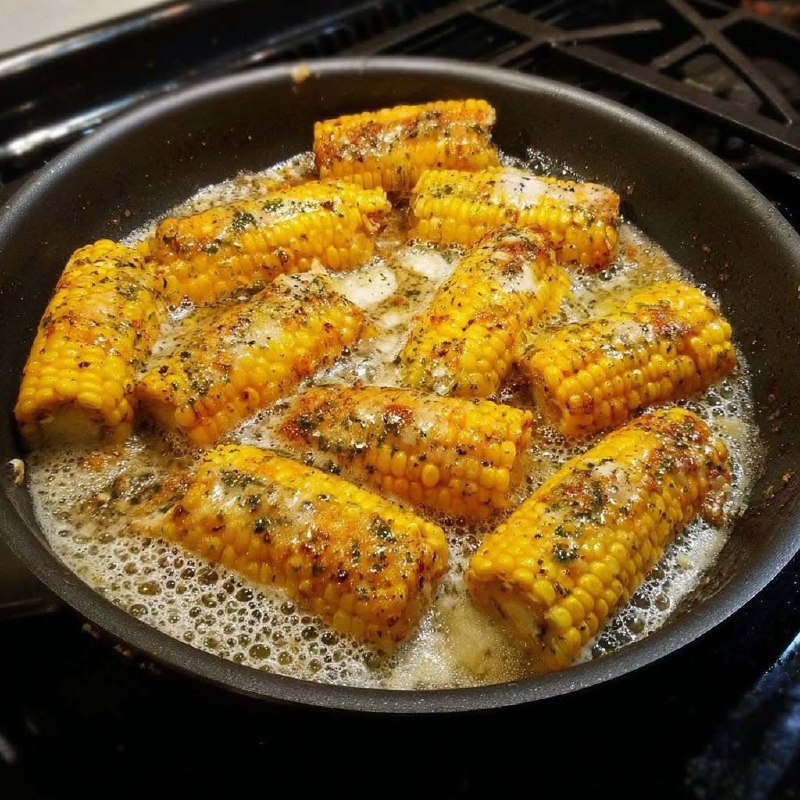
- Add the Corn to the Pan: Carefully place the cut corn pieces into the skillet in a single layer if possible. Arrange them so they are nestled in the garlic butter sauce.
- Cook and Infuse: Reduce the heat to medium-low. Allow the corn to cook, turning the pieces every 2-3 minutes, ensuring all sides are coated in the creamy garlic butter. The goal is to gently simmer the corn in the butter, allowing it to absorb the flavors and become tender-crisp. Continue cooking for 10-15 minutes, or until the corn is cooked through but still retains a slight bite. The butter sauce will thicken slightly and become more opaque.
- Baste and Finish: Throughout the cooking process, periodically spoon the creamy garlic butter sauce over the corn pieces to ensure maximum flavor infusion. If using, now is the time to stir in a pinch of red pepper flakes for a subtle kick.
- Adjust Seasoning and Garnish: Taste a piece of corn and adjust salt and pepper if necessary. If desired, stir in 1 tablespoon of fresh lemon juice just before serving to brighten the flavors.
- Serve Immediately: Transfer the creamy garlic butter corn on the cob to a serving platter. Drizzle any remaining sauce from the skillet over the corn. Garnish generously with fresh chopped parsley or chives for a pop of color and fresh flavor. Serve hot and enjoy!
Cooking Tips and Variations
For the best results, always start with the freshest corn you can find. Look for ears with bright green husks that are tightly wrapped, and feel firm to the touch. The silk should be slightly damp and golden or brown. When cutting the corn into pieces, use a stable cutting board and a sharp knife, holding the corn vertically with one end on the board for safety. Don’t overcook the corn; you want it tender but still with a satisfying slight crunch. Overcooked corn can become mushy and lose its vibrant flavor. To prevent garlic from burning, add it to the melted butter and sauté it gently for only about 30 seconds before adding other seasonings. Burnt garlic can impart a bitter taste to your entire dish. This recipe thrives on the richness of butter, so don’t be shy! The generous amount of butter creates the creamy sauce that coats each piece of corn beautifully.
To really boost the flavor, consider adding a pinch of red pepper flakes along with the other dried seasonings for a subtle warmth and kick. For a brighter, more acidic note that cuts through the richness, a squeeze of fresh lemon juice at the very end of cooking can make a world of difference. You can also experiment with different herbs; fresh dill or cilantro could offer interesting variations. For a cheesy twist, sprinkle some grated Parmesan cheese over the corn during the last few minutes of cooking or just before serving, allowing it to melt into the creamy sauce. If you’re out of fresh corn, you can use frozen corn on the cob. Just make sure to thaw it completely and pat it very dry with paper towels before adding it to the skillet to prevent excess water from diluting the sauce. This dish is incredibly versatile and pairs wonderfully with grilled meats, roasted chicken, or any summer BBQ fare. Don’t forget to season to taste throughout the process, adjusting salt and pepper as needed to suit your preference.
Storage and Reheating
To store any leftover Creamy Garlic Butter Corn on the Cob, allow it to cool completely to room temperature. Once cooled, transfer the corn and any remaining creamy sauce into an airtight container. Refrigerate promptly within two hours of cooking. It will keep well in the refrigerator for up to 3-4 days. For the best quality and food safety, avoid leaving it out at room temperature for extended periods.
When you’re ready to reheat, there are a few good options. The microwave is the quickest method: place the corn pieces and some of the sauce in a microwave-safe dish, cover loosely, and heat on medium power for 1-2 minutes, stirring halfway through, until heated through. Be careful not to overheat, as this can make the corn tough. For a stovetop method, which helps retain some of the texture, place the leftovers in a skillet over medium-low heat. Add a splash of water or a small pat of butter if the sauce seems too thick or dry. Cover the skillet and heat gently, stirring occasionally, until the corn is warmed through. This method also allows the flavors to meld beautifully again. You can also reheat it in an oven or toaster oven at 300°F (150°C) for about 10-15 minutes, covered with foil, until hot. Whichever method you choose, reheat until piping hot throughout to ensure food safety.
Frequently Asked Questions
Can I use frozen corn on the cob for this recipe?
Yes, you can absolutely use frozen corn on the cob as an alternative to fresh. Just make sure to thaw it completely before cooking. After thawing, it’s crucial to pat the corn pieces very dry with paper towels. This step helps prevent excess water from diluting the rich garlic butter sauce and ensures the corn can properly absorb all the delicious flavors during cooking.
What can I serve with Creamy Garlic Butter Corn on the Cob?
This versatile side dish pairs wonderfully with a wide variety of main courses. It’s excellent alongside grilled meats like steak, chicken, or pork chops. It also complements roasted dishes, such as a whole roasted chicken or turkey. For a summer meal, serve it with BBQ ribs or pulled pork. It’s even delicious with simple weeknight meals like pan-seared fish or veggie burgers. Its rich flavor makes it a standout accompaniment to almost any savory dish.
How can I make this recipe spicier?
If you enjoy a bit of heat, there are several ways to kick up the spice level. You can add a pinch or two of red pepper flakes along with the other dried seasonings during the cooking process. For a more intense heat, finely mince a fresh jalapeño or serrano pepper and sauté it with the garlic. A dash of your favorite hot sauce stirred in at the very end can also add a quick and easy layer of spice.
Can I make this dairy-free or vegan?
Yes, you can easily adapt this recipe to be dairy-free or vegan. Simply substitute the unsalted butter with an equal amount of your favorite plant-based butter alternative. Most plant-based butters perform very similarly to dairy butter in terms of melting and sautéing, ensuring you still get that luscious, creamy texture and rich flavor without any dairy products.


