
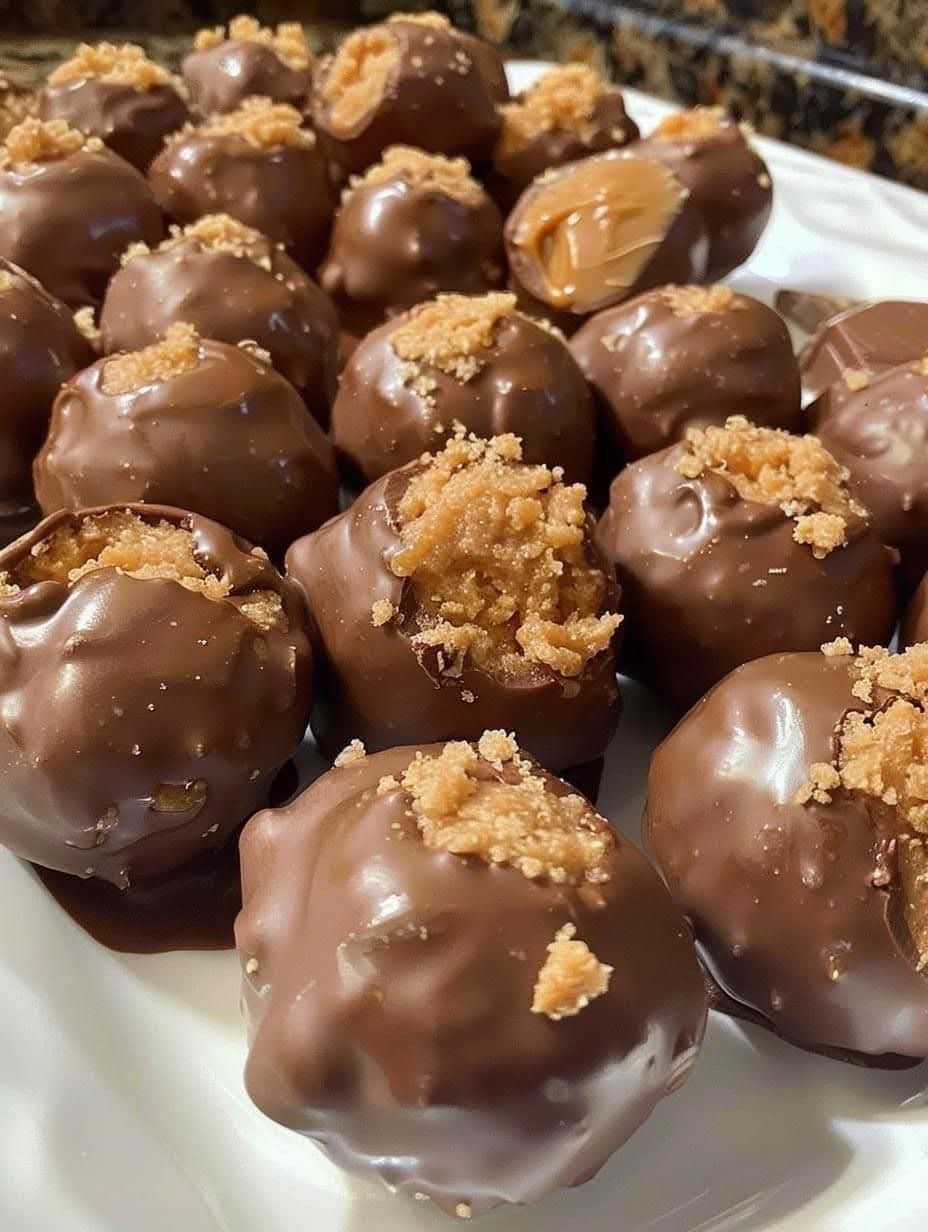
Chocolate Peanut Butter Truffles
If you’re a fan of peanut butter and chocolate, these homemade Chocolate Peanut Butter Truffles will quickly become your new favorite treat. Smooth, creamy peanut butter filling is coated in a rich chocolate shell, creating bite-sized candies that taste indulgent yet are surprisingly simple to make.
These no-bake truffles are perfect for holidays, parties, or just as a sweet snack to keep in your fridge. They’re freezer-friendly, endlessly customizable, and a fantastic way to impress your family and friends without spending hours in the kitchen.
Ingredients
- 1 ½ cups creamy peanut butter
- ½ cup unsalted butter, softened
- 2 cups powdered sugar
- 1 teaspoon vanilla extract
- ¼ teaspoon salt
- 3 cups milk chocolate chips (or semi-sweet chocolate)
- 2 tablespoons shortening or coconut oil (optional, for smoother chocolate)
- Crushed graham crackers, cookie crumbs, or sea salt (for garnish)
Step-by-Step Instructions
Step 1: Make the Peanut Butter Filling
- In a mixing bowl, combine peanut butter, softened butter, vanilla extract, and salt.
- Add powdered sugar gradually, mixing until a thick dough forms.
- The mixture should be firm enough to roll into balls but not too dry.
Step 2: Shape the Truffles
- Scoop about 1 tablespoon of mixture and roll into balls.
- Place on a parchment-lined baking sheet.
- Freeze for 30 minutes until firm.
Step 3: Melt the Chocolate
- In a microwave-safe bowl, melt chocolate chips with shortening (if using) in 30-second intervals, stirring until smooth.
- Alternatively, melt chocolate using a double boiler.
Step 4: Coat the Truffles
- Dip each peanut butter ball into the melted chocolate using a fork or dipping tool.
- Allow excess chocolate to drip off.
- Place back on parchment paper and sprinkle with crushed graham crackers or sea salt while still wet.
Step 5: Chill and Serve
- Refrigerate for at least 1 hour until chocolate is fully set.
- Store in an airtight container in the fridge or freezer.
Variations
- Dark Chocolate Truffles: Use dark chocolate instead of milk for a richer flavor.
- Nutty Crunch: Add chopped peanuts or almonds to the filling.
- Cookie Butter Truffles: Replace peanut butter with cookie butter for a spiced twist.
- Holiday Version: Drizzle with white chocolate and add festive sprinkles.
- Healthy Swap: Use natural peanut butter and dark chocolate for a lighter option.
Nutritional Information (Per Truffle)
| Nutrient | Amount |
|---|---|
| Calories | 160 |
| Protein | 3 g |
| Carbohydrates | 15 g |
| Fat | 10 g |
| Fiber | 1 g |
| Sugar | 12 g |
| Sodium | 70 mg |
(Values may vary based on chocolate type and portion size.)
Storage and Reheating Tips
- Refrigeration: Store in the fridge for up to 2 weeks.
- Freezing: Freeze truffles in a sealed container for up to 3 months. Let thaw at room temperature before serving.
- Serving Tip: Serve slightly chilled for the best texture.
Pro Tips for Perfect Truffles
- Chill before dipping – firm centers are easier to coat.
- Use a fork or dipping tool for a smooth chocolate finish.
- Don’t overheat the chocolate – keep it glossy and smooth.
- Garnish immediately – toppings stick best before chocolate sets.
- Work in batches – keep truffles cold before dipping to avoid melting.
FAQs
Q: Can I use crunchy peanut butter?
A: Yes! It will add texture to the truffles.
Q: Can I make these dairy-free?
A: Absolutely. Use vegan butter, dairy-free chocolate, and natural peanut butter.
Q: My chocolate coating looks streaky. What happened?
A: This usually means the chocolate was overheated. Melt slowly and stir often.
Q: Do I need to temper the chocolate?
A: Not required, but tempering gives a shinier, snappier shell if desired.
Final Thoughts
These Chocolate Peanut Butter Truffles are the ultimate no-bake dessert. With their rich, creamy centers and smooth chocolate coating, they’re a crowd-pleaser for any occasion. Whether you keep them classic or add fun variations, they’ll always disappear fast. Make a double batch—you’ll be glad you did!


